Good day, folks! Sean here from Air Photography. This is my beginner’s guide for the new DJI Osmo Pocket 3. This video is geared toward those who have never used one before, and it will help you get familiarized with the hardware and the software, getting you up and running quickly.
DJI Osmo Pocket 3 Beginners Guide Video
We’ll stick to the basics in this beginner’s guide. If you want to learn more advanced techniques and features, make sure you’re subscribed to my channel, as we’ll be making many more advanced tutorials along the way.
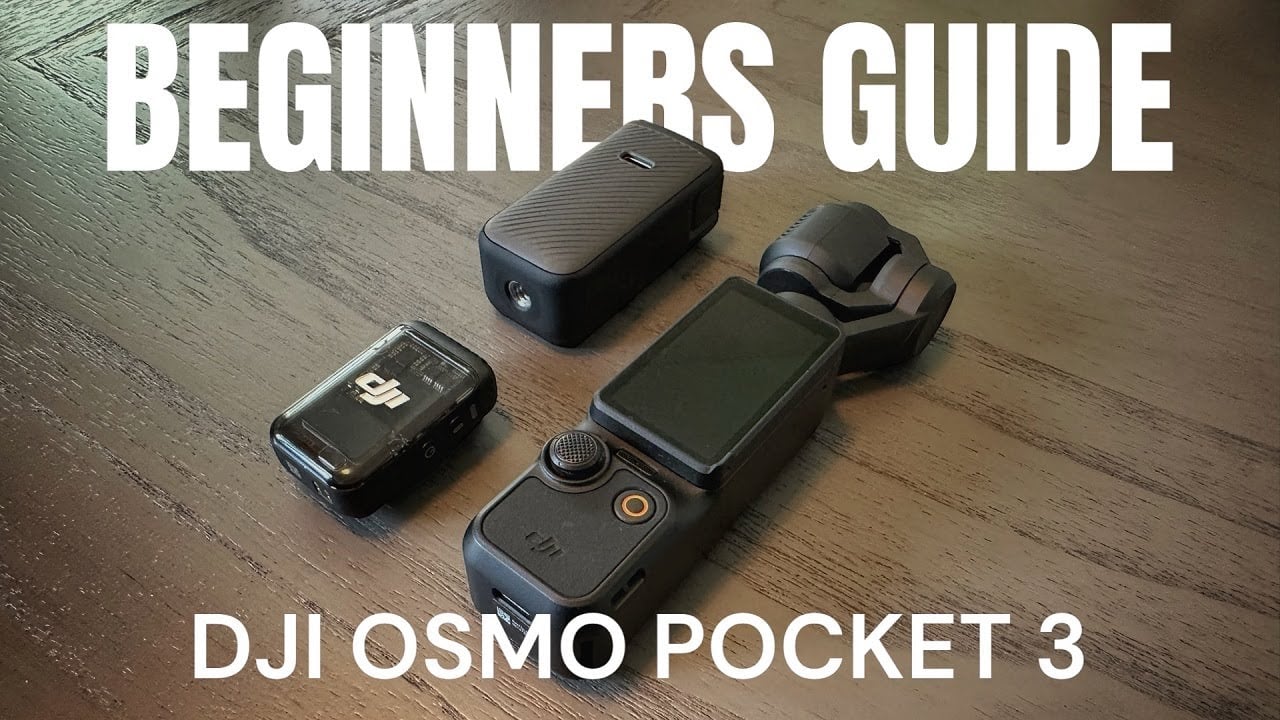
Now, there are two different packages available for the Pocket 3. You can get the basic package, which contains everything on this side of the desk, or you can get what’s called the Creator Combo.
The Creator Combo comes with everything from the basic package, priced at $519, and includes the camera, a hard case, an accessory mount (which we’ll discuss shortly), a charging and data cable, and a wrist strap.
If you opt for the Creator Combo, priced at $669, you’ll also get a case, an extended battery handle (more details to follow), a wireless microphone, a wide-angle lens to expand the field of view, and a windscreen (dead cat) for the microphone, which is handy for windy outdoor conditions.

Now, let’s take a closer look at all the equipment that comes with these packages. We’ll start with the camera itself.
The Pocket 3 features a rotatable screen on the front that allows us to adjust settings. Below that, we have a multifunctional joystick.
To the right, there’s a record button that can also act as a power button when needed.
On the left side, we have the memory card slot, and at the bottom, there’s a USB-C port for charging the built-in battery, updating firmware, and transferring content to other devices.
Next, we have an accessory that comes with both the basic package and the Creator Combo.
This accessory connects to the bottom of the camera, providing a quarter-inch mount, allowing you to attach the Pocket 3 to tripods or extension poles.
There’s a button to release it, and a USB-C port for charging or data transfer.

Moving on, we have the extended battery handle. This accessory not only extends the recording time by about 62%, but it also provides a larger handle for better grip, ideal for vlogging.
Like the previous accessory, it features a quarter-inch mount and can be charged together with the camera or separately.
The Creator Combo includes a wireless microphone. This transmitter automatically connects to your Pocket 3, providing clear audio.
It’s essential for vlogging and various recording scenarios. The microphone can also act as a field recorder, allowing you to capture audio separately.
The Creator Combo offers additional accessories, including a wide-angle lens that attaches magnetically to the camera, expanding the field of view.
There’s also a windscreen (dead cat) for the microphone, useful for reducing wind noise during outdoor recording.
Both packages come with a hard protective case, specially designed for storing the Pocket 3.
The case includes slots for the wide-angle lens, microphone, and more. It’s a practical solution for keeping your gear protected.
You also receive a mini tripod, which can be used by attaching it to the bottom of the extended battery handle or the accessory mount. It’s handy for stable shots and tracking with the Active Track feature.
Lastly, there’s the carrying case, exclusive to the Creator Combo. It holds all the components neatly in place.
Keep in mind that the Pocket 3 doesn’t include internal memory, so you’ll need to purchase a compatible memory card separately.
I recommend SanDisk Extreme or Extreme Pro. Insert the card into the memory card slot, ensuring the graphic faces away from the screen.
To charge your Pocket 3, you’ll need a USB-C charging brick, which is not included in the package. Many third-party options are available, or you can purchase one from DJI’s website.
Now, let’s get your camera ready for first-time use. When you purchase the Pocket 3, it needs activation and may require firmware updates.
To do this, download the DJI Mimo app on your smartphone. Connect your Pocket 3 to the app, follow the activation process, and install any necessary firmware updates.

After activation, you don’t need the Mimo app for regular camera use. However, it can be helpful for a live preview, remote control, and gimbal control.
The Pocket 3 can be powered on in two ways. You can simply rotate the screen, which is the default method.
Alternatively, you can use the record/shutter button. Press and hold it to power on, and press and hold again to power off manually.
The camera will automatically power off if the screen is rotated unless you cancel the timer.
You can choose between different media capture modes, such as panoramas, photos, videos, low-light video mode, slow motion, and time-lapse. For more details on these modes, check out dedicated tutorials.
The camera can capture both horizontal and vertical footage. To switch to vertical mode, rotate the screen and tap “Continue.” Note that the resolution changes to 3K in vertical mode, but it’s still suitable for most purposes.
Quick Record mode allows the camera to start recording immediately upon power-on. To enable it, swipe down from the top and activate the “Screen Rotate and Capture” feature. You can customize it to start recording video, low light, hyperlapse, or use your last setting.
The joystick is multifunctional. It can adjust the gimbal’s position by moving it up, down, left, or right.
Press and hold it to lock the camera’s position, or double-press to reset the gimbal.
A triple press rotates the gimbal for selfie mode. Selfie mode can also be enabled by pressing the button at the bottom right.
The Pocket 3 has an ActiveTrack feature, allowing you to track subjects by selecting them on the screen. It can track objects or faces when in selfie mode. ActiveTrack helps keep the subject centered, even when it’s moving.
Zooming up to two times is possible with a digital zoom feature. Use the slider on the right or switch to joystick control to zoom in and out smoothly.
To review captured media, swipe from the left. You can view, play, and manage your photos and videos from here. Deleting files and selecting favorites is also possible.
For advanced camera settings, you can enable Pro mode. In Pro mode, you can adjust settings
like white balance, color, and exposure. You can also apply glamour effects to enhance your appearance. More settings can be customized through the DJI Mimo app.
Lastly, you can adjust the gimbal’s rotation speed to suit your shooting style. Faster speeds work well for rapid movements, while slower speeds create smoother cinematic shots.
I hope this beginner’s guide helps you get started with your DJI Osmo Pocket 3. If you have any specific topics you’d like to learn more about, please let me know in the comments, and I’ll consider them for future tutorials.
Thank you for watching, and don’t forget to hit the thumbs up button if you found this video helpful.
See you in the next one!”








+ There are no comments
Add yours