


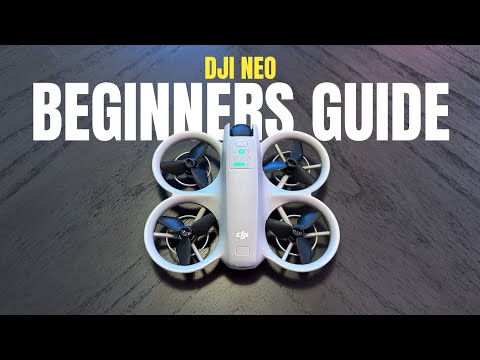
Good day, folks. Shawn here from Air Photography, and this is my beginner’s guide for the new DJI Neo. These beginner guides are designed for those who have never flown a drone before, to help get you familiarized with the hardware and software, and prepare you for your very first flight.

The DJI Neo could be especially important, as it is a quite versatile drone. There are many different ways in which you can utilize it and many different ways in which you can fly it. This thing can be completely autonomous, where you don’t need a controller to fly it – it’ll take off from the palm of your hand and perform various tasks. You can also fly it with a smartphone, again without a controller. And if you want more traditional drone flights, you can fly it with a controller. You can even connect it to things like the DJI Goggles 3 and a motion controller to have an immersive FPV flight experience.
We’re going to touch base with all these different modes throughout this video. We’re not going to go over every single aspect of the DJI Neo, as there is a lot to cover. But if you are interested in this drone and plan to purchase it, make sure to subscribe to my channel, as we will be creating different tutorials and videos on very specific subjects.
Purchasing the DJI Neo
To get started, let’s talk about the different packages you can purchase for the DJI Neo. The first way you’ll be able to buy it is just the Drone only. If you plan on using it in autonomous mode, you don’t need any controller, you just need the drone.
When you purchase the drone only kit, you get the Drone, one pre-installed battery, two spare props, a charging and data cable, and a screwdriver (which is needed to change the props).
The combo package is the same, but it also includes a charging hub and two spare batteries, giving you a total of three batteries.
Depending on your location, there may also be a bundle that includes the RC-N3 controller. This allows for more traditional drone flight controls.
Exploring the DJI Neo Hardware
Let’s take a quick look around the drone itself. At the front, where the camera is, we have a guard. It’s a good idea to keep this on when traveling with the Drone, as it helps protect the gimbal.
On the front, we also have a button that allows us to cycle through the different intelligent flight modes, including a custom mode that can be configured to your needs.
At the back, we have the power button, which is used to turn the Drone on and off, as well as pair it to a new controller or the goggles.
The USBC port at the back can be used for charging, firmware updates, and transferring content to a computer or mobile device.
The bottom of the drone has some sensors, and of course, the battery, which is removable by pressing down on the tab.
To power on the Neo, it’s a double-press, just like most DJI equipment – a short press followed by a long press.
Storage and Memory
Unlike many drones, the DJI Neo does not have a memory card slot. Instead, it has 22GB of built-in storage. This means you don’t need to worry about carrying around extra memory cards.
Charging the DJI Neo
To charge the DJI Neo, you have a couple of options. If you have the combo package, you can use the charging hub, which can charge all three batteries simultaneously. You’ll need to provide your own charging brick, though – DJI recommends a 45W or higher charger.
If you just have the Drone only, you can charge it directly using the USBC port on the back. Again, you’ll need to provide your own compatible charger.
The RC-N3 controller also needs to be charged, with a USBC port located at the bottom.
Getting Familiar with the RCN3 Controller
The RC-N3 controller is an optional accessory for the DJI Neo. When you first get it, the control sticks will be stored in the bottom, as they are designed to be easily transported without damaging the gimbal.
The controller has a variety of buttons and controls, including:
- Function button
- Return to home and brake button
- Pause button
- Flight mode selector (Sport, Normal, Cine)
- Gimbal wheel
- Shutter/Record button
- Phone mount
To power on the controller, it’s a quick press followed by a long press, just like the Drone.
Activating and Updating the DJI Neo
Before you can use the DJI Neo, it needs to be activated and the firmware needs to be updated. The easiest way to do this is through the DJI Fly App.
Download the DJI Fly app on your iOS or Android device. If you don’t have a DJI account yet, you’ll need to create one. Once the app is installed, power on the Drone and it should be detected automatically. Follow the prompts to connect the Drone to the app and update the firmware.
Flying the DJI Neo Autonomously
One of the key features of the DJI Neo is its autonomous flight capabilities. You can launch the drone from the palm of your hand and have it perform a variety of intelligent flight modes without needing a controller.
The drone has six preset intelligent flight modes, including:
- Follow: The drone will follow you around.
- Dronie: The drone will fly up and backward, giving you a drone’s-eye view.
- Circle: The drone will circle around you.
- Rocket: The drone will fly straight up and film straight down.
- Spotlight: The drone will lock onto you and rotate to keep you centered in the frame.
- Custom: You can customize this mode in the DJI Fly app.
To activate these modes, simply press the button on the front of the Drone to cycle through the options. When you’re ready to launch, make sure the camera is facing you, then press and hold the button to initiate the flight.
The drone will take off and perform the selected intelligent flight mode. You can also control these modes directly in the DJI Fly app, allowing you to adjust parameters like the circle radius or follow distance.
Flying the DJI Neo with a Controller
If you prefer a more traditional drone flight experience, you can connect the DJI Neo to the RCN3 controller or other compatible controllers.
When using a controller, it’s important to check the safety settings, such as the return-to-home altitude. This ensures the drone will come back to you safely if it loses connection or the battery gets low.
The controller provides a more precise and responsive flight experience, with the left stick controlling altitude and rotation, and the right stick controlling forward/backward and lateral movement.
Transferring Footage from the DJI Neo
Once you’ve captured footage with the DJI Neo, you can transfer it to your mobile device or computer in a couple of ways.
Using the DJI Fly app, you can connect to the Drone and download the footage directly to your device’s photo library.
Alternatively, you can connect the Drone directly to your device using a USBC cable. On an iPad or iPhone, it will show up as a storage location in the Files app, allowing you to browse and transfer the footage.
Conclusion
The DJI Neo is a highly versatile drone that offers a variety of flight modes and control options. Whether you’re interested in autonomous flights, traditional drone controls, or an immersive FPV experience, the Neo has you covered.
Be sure to subscribe to my channel, as I’ll be creating more detailed tutorials and videos on specific aspects of the DJI Neo. Happy flying!
Discover more from DroneXL
Subscribe to get the latest posts sent to your email.


+ There are no comments
Add yours