


Smartphones have slowly changed the way that we capture, create, and consume content. It seems like everything we watch now through social media is vertical, so in order to fit the native aspect ratio of these apps and of our phones, more content is captured every single day in this vertical format.

DJI’s Vertical Gimbal Innovation
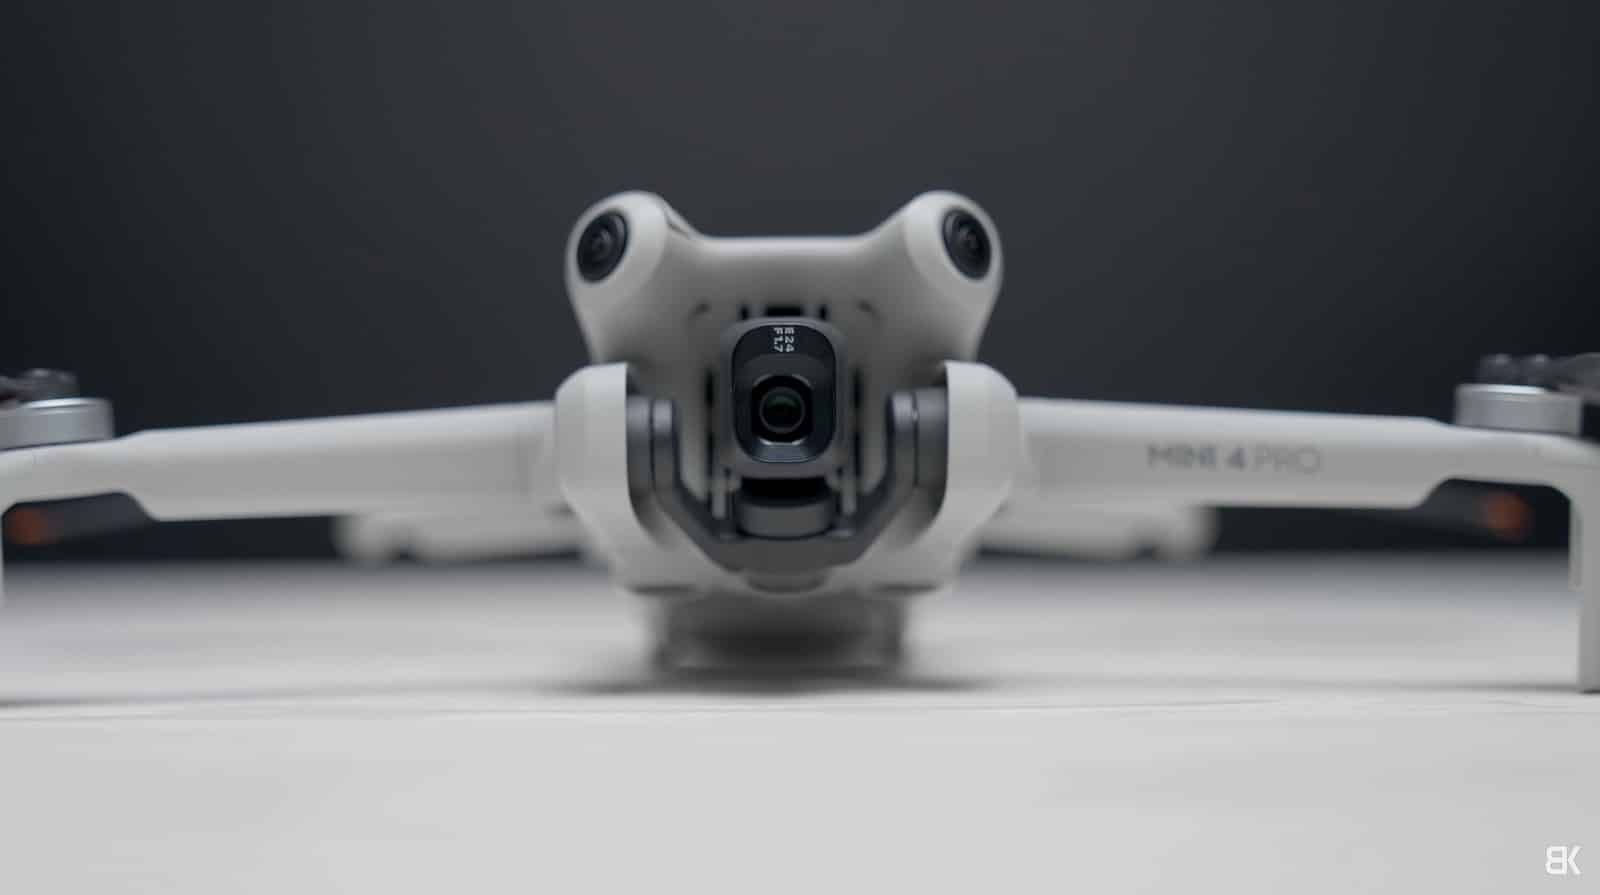
With this in mind, DJI redesigned the gimbal on their mini class of drones, starting with the Mini 3 Pro and extending to the newer Mini 4 Pro, to now physically rotate vertically. This means that you can capture both photos and videos natively in a vertical format, which brings along a lot of benefits:
- It’s easier to frame
- You get a true 4K output when shooting video
- You get to capture full-resolution portrait images
- You get to use the full focal length of the lens (in this case, 24mm)

Historical Context
For those newer to drones, this actually isn’t the first DJI drone that could do this. The original Mavic Pro, released in 2016, had a camera that could spin and rotate to capture vertical content natively. This was the first drone, as far as I’m aware, to have a feature like this, but it didn’t stick around for long as it wasn’t added to any other drone released after for quite some time.

Traditional Vertical Content Creation
I’ve been shooting and distributing vertical content for years now without the need for a camera that rotates, and quite frankly, I think the results look great. Everything over on my Instagram gets posted vertically, and a good amount of that content was captured with a drone that shoots a traditional horizontal image, mainly from my Mavic 3 Pro, but was cropped after the fact to fit the native vertical aspect ratio that Instagram likes.
Advantages of Cropping Horizontal Images
There are some trade-offs to cropping down your horizontal image, but I think there are actually some benefits to doing this as well. For example, if I use the Mavic 3 Pro:
- I can take advantage of three different cameras and focal lengths to get different shots when I’m up in the air, and then I can crop those down to fit that vertical frame.
- I can also use the main 24mm camera, which in my opinion is way better than the Mini 4 Pro’s camera. You’ve got better dynamic range and better colors overall. It has a better-looking image coming from that camera, which again is something that I prefer to shoot with.
How to Capture Vertical Video with Any Drone
Let me walk you through my process of how to capture vertical video with any drone:
- Enable the grid lines on your drone. It doesn’t matter what drone model you fly or what brand it is; your drone should have something similar.
- For those using a drone that flies with the DJI Fly App:
- Tap on the three dots in the top right corner
- Go to the camera menu
- Find the section for shooting lines
- In this menu, I also like to turn on the center point to help me frame up my shot, but grid lines are really what’s most important to make this work

Once we head back to the live feed, there’s now this grid on the screen that displays our rule of thirds, which helps when framing photos and videos. We instead are going to use it as a boundary for capturing vertical video. These two middle lines will replicate a vertical 9×16 aspect ratio, so if we can just forget that the sides outside of this area exist and try to frame our video in the middle, then when we crop our video, it’ll turn out perfect.
Frame Guide Option
There’s also an option under the camera settings that allows you to display a frame guide on certain drones, with one of the options being that vertical crop. Looking at the shooting screen, things look a bit different as outside of the guide is now dimmed to help you focus on what’s in the vertical frame. But the drone is still capturing the full width of this frame in horizontal format; you’ve just got to crop it after the fact.

Personally, I prefer to use the grid line feature over the frame guide because it gives me better visibility of what it is that I’m shooting, and like I mentioned, those middle lines will help you frame your shot perfectly.

Benefits of This Approach
Overall, a huge benefit to shooting like this is that you still have a horizontal frame for a traditional delivery method. It’s kind of like you’re getting the best of both worlds. My workflow when shooting is to fly a bit further back to fit more in the frame vertically. This means I’m basically shooting a little bit wider to get more inside of the vertical portion that I want to deliver.
This is the first major step to capturing vertical video with any drone that you fly, and while it’s not absolutely necessary (like you can still capture a vertical video and crop it down after the fact without enabling the frame guide or the grid lines), it is going to help you tremendously frame up your shot.
Post-Production Workflow
Now that we have our video clips, it’s time to make them vertical using any video editing app. You’ll want to create a new project or sequence that is, of course, vertical. I like to make my final video file 4K, so 2160 pixels wide by 3840 pixels high. Even though the video isn’t shot in this format, it’ll still upscale.
Dragging our horizontally shot piece of content into a vertical frame looks hilariously wrong because of the black bars above and below, but to fix this, all we need to do is adjust our scale until the frame fills the entire aspect ratio of the video. I found that a 37% scale will get you cropped perfectly.
Now, if we properly framed our shot, this is all that we have to do. When we play back our video, the framing will match those vertical grid lines from the remote, so we can export our clip or continue on with our editing. That all depends on the project that you’re working on.

Adjusting Framing with Keyframes
If you instead have a clip where your subject falls out of frame to the left or to the right, don’t worry. Remember, we have a full horizontal video to play with, so using keyframes, you can move your frame to the left or to the right to make sure your subject stays in the shot. Here’s how:
- Start at the beginning of the clip and adjust your scale appropriately to fill the entire frame.
- Begin watching the video, and as your subject starts to fall out of frame, place a keyframe.
- Wait until the next time that the subject becomes still. At this point, drop another keyframe and adjust your clip’s position.
Now when you watch that same clip back, the positioning of your frame will adjust between keyframes from one position to another, keeping your subject perfectly framed up.
Addressing Quality Concerns
For those of you that have an issue with cropping down a 4K horizontal video to an upscaled 4K vertical video, TRUST me, I am here with you. But I’d rather have the flexibility of multiple distribution methods, so again, that horizontal video that I can upload and the vertical video I can upload to multiple social media platforms.
You could go the route of adding digital sharpening if you wanted to if you think that it looks that dull or blurry, but usually, I’ve found that after uploading to Instagram and going through their compression algorithm, it really doesn’t matter. It’s going to look fine for most people watching your video.
High-Quality Vertical Video Solution
Here is my overkill method whenever I know that I need a high-quality vertical 4K video as well as a horizontal video: In the air, I fly my DJI Inspire 3. Yes, I know this is not an end-all-be-all solution for anybody that flies any drone because it’s way more expensive and bigger than, say, the Mavic 3 Pro or the Air 3, for that matter. But the Inspire 3 can shoot 8K video, and let me say, it looks incredible.
Comparison: Inspire 3 vs. Mavic 3 Pro
When I put the two vertical videos side by side (Inspire 3 and Mavic 3 Pro), man, you can just see the difference. Now I’m comparing a $20,000 drone with a prosumer drone, so of course, the video is going to look much better. But this is kind of a really good comparison between what a cropped-down, upscaled 4K vertical video will look like compared to a native 4K video. It definitely does look very different, and also, man, that full-frame sensor on the Inspire 3 is incredible.

Photo Editing Process
To switch gears really quickly, for those that shoot more photos, the process is very similar and honestly way easier. As long as you use those guidelines to frame up your shot, when you’re editing in Lightroom or any equivalent platform, you can just switch your crop to vertical and choose whichever aspect ratio fits your sharing needs best. For example, on Instagram:
- If you’re exporting a cover image for a Reel, it’ll be 9:16
- If you instead want to share the photo as a post, the aspect ratio would be 4:5
Content Distribution Considerations
When it comes to content distribution, your photos and videos, how do you want to share them? Vertically, horizontally? It really depends on the platform you’re posting to, what your goals are, and maybe if you’re shooting for somebody, what your client wants. For me, I’d rather have the most flexibility possible, which comes from shooting horizontal all the time and cropping vertical if I need to.
Benefits of Shooting Horizontal and Cropping Vertical
There are plenty of benefits to this approach:
- Flexibility to crop horizontally if your subject falls out of the frame, so you can fix it very easily in post.
- Focal length considerations: When shooting with the Mini 4 Pro natively in vertical, sure you get the full 4K output, but I just feel like the actual video is too wide.
- Better quality: I would take the colors and the dynamic range from the larger Mavic 3 Pro sensor over the smaller camera on the Mini 4 Pro all day long.
- Horizontal video is inherently better: Let’s be real with ourselves, horizontal video is way better than vertical video, and it’s not even an argument.

This allows me to share the same shots that I’m taking here on my channel in a full widescreen format and then crop down to share with my audience over on Instagram in a vertical format. So yes, you can shoot vertical video with any drone available on the market. It doesn’t matter if it can actually rotate vertically or if it’s fixed horizontally; you just need to know the workflow.

For me, I’d rather go through the workflow I just mentioned to have the flexibility of a vertical and a horizontal format that I’m able to share. I also think that shooting horizontal video is really going to future-proof your video. I mean, we’re already seeing all these virtual reality headsets pop up: Apple Vision Pro, The Meta Quest. For the future, are you going to want to see a tiny vertical frame in a headset that gives you full field of view, or do you want to fully immerse yourself with a nice horizontal video? For me, I’d rather future-proof my video and always shoot horizontal and crop vertical if I need to down the road.
Anyway, thank you guys so much for watching. Let me know your thoughts down below, and as always, I’ll talk to you later. Peace.
Discover more from DroneXL
Subscribe to get the latest posts sent to your email.

+ There are no comments
Add yours