


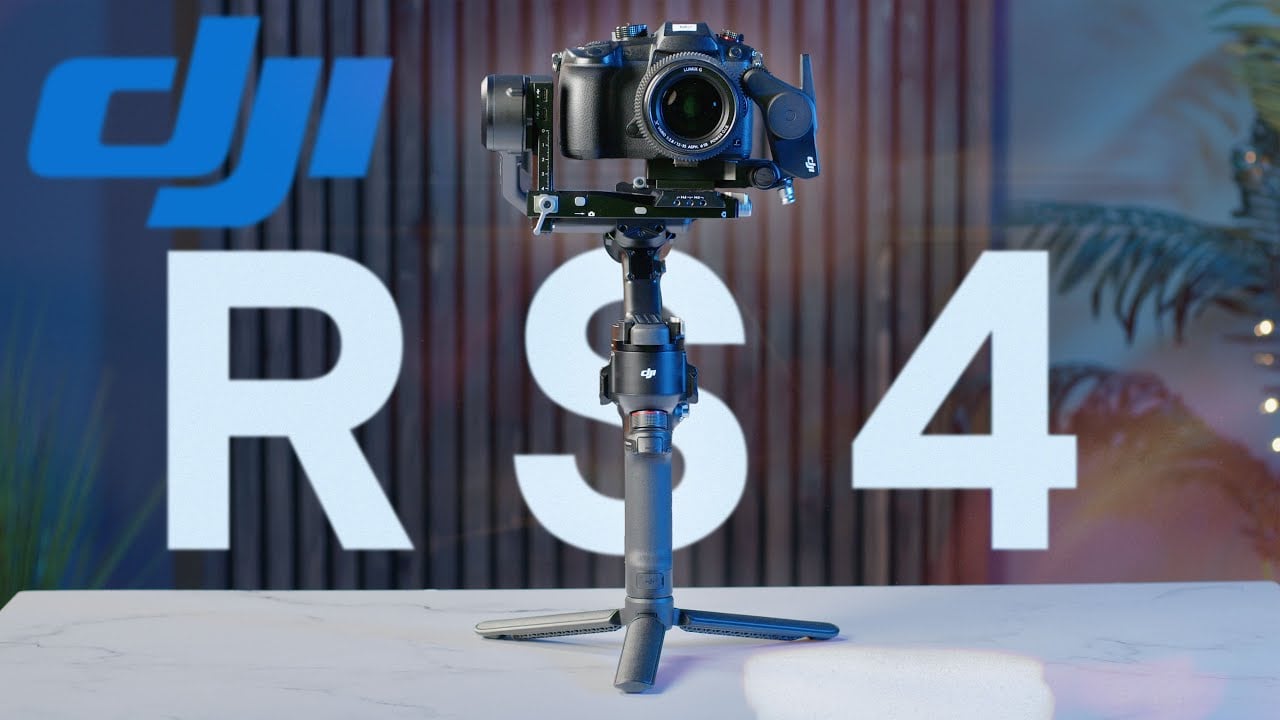
I know what you’re saying: you clicked on this video and this is a gimbal review on a drone channel. What in the world? Well, as it turns out, we’ve been using gimbals for a very long time. As a matter of fact, since the original Ronin right here. I bought this thing before Pilot Institute was even a thing, and then we got the RS2, and then we got the RS3 Pro, and then the RS3 Mini. We also have these little gimbals here: the Osmo Mobile, the Osmo Pocket 3. And then, now today, DJI is releasing this thing which is the RS4. There’s going to be a DJI RS4 Pro model as well.
Comparing the DJI RS4 to Other Ronin Models
Now, as you can tell, it’s a slightly different size in here, right in between the Mini and the Pro from the RS3 version. I’m going to talk about all the different features that are coming in here, also how to set up two of these motors in here (one for zoom and one for focus), and then we’ll talk about how it integrates with all the different cameras. Let’s get to it.
Battery and Tripod
Now the gimbal is fully disassembled on here because I’m going to go part by part and kind of explain what’s going on. First off, the battery. This is the same battery that you had on the RS3. This is the battery from the RS3 Pro, so slightly smaller, but these are compatible. So if you have one of these or an RS2 battery, you’ll be able to reuse it. It’s slightly bigger than the Mini battery but still a great form factor. I think even my hands are not huge, but they’re also not small. This is kind of a good fit right here. It also comes with the good old tripod. If you’ve ever used one of these on the previous version, then you can easily set it right here or use it in order to hold the gimbal in place.
Main Gimbal and Plate
Now from here, the next piece is going to be, well, the main gimbal right here, which slides in nicely on top of your battery, and you’re going to lock it by going down right here, nice and tight. Now what you’ll notice is there’s a way to lock this by hand if you wanted to. It’s fully automated like the RS3, where you turn it on and off and it’s going to lock in place. But the big difference with this new model is the plate that goes right here. You notice this is extremely short, and I think this is for transportation, by the way, so it takes a lot less space when it’s folded. But this is the plate. It’s a Manfrotto-adaptable plate, so if you have a good old Manfrotto plate, you can put it right in here, or if your camera is already mounted to one of those, then you don’t have to worry about it. You’ll notice in here we have a bit of a slot where we can put it in and then a tight screw right here to tighten it. This is your plate.
Vertical Mounting
Now, you’re going to say, “Why in the world would you add another plate just like this?” Well, here’s the trick. If we release (push the release button right here), now at the bottom we have the same symbols, and we put them in place, and now your camera can be mounted vertically without messing with it like you did on the RS3 Pro. Very nifty if you’re going to be doing a long photo shoot or video shoot using the camera in portrait mode. Then it’s nice and nifty. We’ll leave it in landscape mode now.
Manfrotto Plate and Focus Motor
Next is the Manfrotto plate that comes with the gimbal itself. We’re going to slide it in place, and then you’ll notice on the side here we have a knob adjustment so you can make very precise adjustments with your camera and then lock it in place. And of course, right on top up here is the ARRI-compatible plate which we’re going to slide in. I already put it on my camera. This one comes with the 15mm rod attachment that we can put in. There’s also a plate that comes in your box that doesn’t have the rod attachment. So I’m going to slide that in, and then in the back here we have a way to tighten the camera sideways. We’ll do the full adjustment in a minute. And then here we have a focus motor or zoom motor.

Now, this is kind of reminiscent… We have a lot of motors in the studio. This is very reminiscent of the original motor that we had on the original RS, and it has FFI right here as well, except this one is not USB compatible, so it doesn’t actually work. But if you have an RS2 or RS3 focus motor, then it’s actually going to work. Now you notice on the side here we mounted an RS2 motor, and then here I’m going to mount this motor right here to do focus or zoom at the beginning.
Mounting the Focus Motor
So you can untighten right here, slide that in, and then put it right here. Now we’re using the GH5S, which we’ve been using outdoors quite a bit, and right now it’s mounted on top of the zoom ring. So this is going to be used for zoom, and I’m going to show you how to set that up in a second in the settings right here.
Balancing the Camera on the DJI RS4
Now, before we use the camera, we have to balance it. This is very important. Make sure you have all the equipment on here. Now, I’m missing a few cables, which is fine for right now, although you would want to do this with all your cables set up. I’m going to go and unlock the yaw right here. I’m going to unlock the pitch and then also we’re going to unlock the roll right here. So make sure the camera can freely move.
Now what you have to do is you have to make sure the camera can be stable. So what I like to do is first, I like to do the back right here. So I’m going to move this arm to the left a little bit. Now there’s new Teflon-coated arms right here, which makes it a little bit easier to slide. In the past, you kind of have to hold them and push along, not always super easy. I’m going to do this one right here. So this one is the only one right here where you go up and down, where it becomes a little bit more tricky to push it in. But again, the Teflon coating does help quite a bit, and then this one right here is actually set up nicely. So it looks like this gimbal is pretty much ready to go.
Now, I did that a little bit before we started recording the video, so that’s a little bit of cheating. Then I’m going to power it on, so tap and hold, and the camera comes on. The screen comes on in the back. There’s a beautiful screen.
Checking Camera Balance
Now, if you look in the back of the screen right away in the top right corner, it tells you if the camera is balanced or not. And if it’s green, then it’s good. If you start to put a little bit of weight on it, then it’s going to turn red or orange. It means your camera is not balanced correctly. There’s also a way to do the testing inside of the menu, and I’m going to show you the menus towards the end of the video.

Gimbal Controls
Let’s talk about the menu in the back. We have the regular controls that you’ve seen before if you’ve used one of these cameras, where you can go left and right and up and down using the joystick (the 4D button in the back), and then you have the record button on the back here which is going to allow you to take photos or start your videos if your camera is compatible. This one is, so we’re in lock.
And then on the right side, they made switching between the PTF, PF, and FPV mode very easy with a nice switch, which means that you can go from one mode to the next. PTF (pan, tilt, and follow), PF (pan and follow), and lastly, FPV (first-person view) mode. In the PF mode, you can move the camera as you pan down, it will pitch down as well. In the PF mode, the pitch is set in place. You can’t change it unless you use the joystick in the back. And in FPV mode, you also add a roll as well if you want to be more like on-board in your footage.

You can double tap on the button right here and the camera is going to recenter. Three times puts it in self-portrait mode, and then two times again brings it back to the front right here.
Switching Between Tilt and Zoom Control
And on the left side here, we have a new button which allows you to switch between using the 4D switch in the back (the joystick) to either tilt up and down or yaw left and right. Or if you switch this button up, this is now going to control your zoom. Now it’s not working right now because we haven’t plugged any of the cables, and this is what I want to get into next.
Setting Up a Single Focus Motor
If you’re going to be using only one motor, then this is going to be pretty straightforward. You’re going to use one cable, you’re going to plug it into the USB plug right here, and then you’re going to plug it into your motor right down here. Make sure it’s not in front of your shot. And now this focus motor is going to be powered. Here it says “F” for focus or “Z” for zoom. We’re going to keep it on focus, even though it’s connected to the zoom section here, and I’m going to show you why in a second.
Now, if I go in here and I turn the wheel, now my wheel right here is controlling my zoom. Now you hear as I go too far, it starts to grab, which is not good. So we can go into the settings.
Calibrating the Focus Motor
So if you swipe down from the top, then you have a bunch of menus becoming available here. And right here on the bottom left corner, you have the focus wheel setup. And you notice in here we can calibrate the motor, which is not necessary at this stage, but we’re going to do manual endpoints. And why is this? Because I want to make sure that the camera, when it’s all the way retracted, that’s our beginning point.
So I’m going to do it… There you go, it stopped. And we’re going to click on “Manual Endpoints”. I’m going to click “Confirm”, and this is our start point. Yep. And I’m going to go and zoom in as far as I want to go until the camera kind of stops right here. I’m going to set the endpoint right here, which means what? Which means that now I have the full range, and it’s not going to let me go any further, and it’s not going to make my camera shake. This is very important before you start using it.
Now you have to go back. Top left corner, slide back up. And then now, if we slide from the bottom, we can go into the dial function here and make sure that you are set up to the focus motor. What does that mean? It means that the dial in the back of the gimbal right here is now going to be set up to control this motor.
Other Dial Functions

Now, you can do it so that you can use focus using Bluetooth. This camera is unfortunately not compatible with that. Or you can see all the other options in here. We can use ISO, we can use pan/tilt, anything you want using this on the back as an additional control. That’s very nifty at this stage.
Controlling Focus and Zoom Simultaneously
Now you might be wondering, this is nice and dandy, but what if I want to control my focus wheel and zoom at the same time? Well, it is possible. You can use another motor, like I’ve mentioned before, from the RS2 or RS3, like the one we have installed right here. We’re simply going to have to set it up as a focus motor, while this one is set up as a zoom motor.

Setting Up Zoom Control
First off, let’s go right here and single press on the power button. Press one more time on the power button until it’s red and blinking on the “Z” for zoom. Now you’ll notice if I move this wheel, nothing happens. But if I switch this left switch here to the zoom functionality and use the joystick, now this is able to control my zoom. You’ll notice it does this because there’s no way to set an endpoint on this functionality, so you’re going to have to be very smooth and controlled.
Setting Up Focus Control
How do we control focus? It’s going to do it by itself. I’m going to use this USB port, plug it into the second USB port that’s down here, and then plug it into the bottom of this motor right here. Now we have dual motor control – I can move the wheel in the back for my focus and use the 4D button up and down for my zoom. Of course, I have one more cable that I can plug into the back. There is a USB port for camera control. I can bring this directly into my camera and now I’m able to control the camera start/stop, focus, and zoom all in one gimbal.
Calibration and Settings
Now let’s go back and take a look at the menus in the back of the gimbal. The first one on the top left is the ability to start calibration for the camera itself. If I do this, it’s going to shake to make sure that everything is calibrated correctly. It takes a few seconds – you can tell we’re already at 40% here. When you’re done, you’ll have a fully calibrated camera and it should be ready to go.
On the bottom right corner is the speed of the gimbal for follow. This is how fast the motors are going to spin as you turn the camera. Usually we have it on medium. It depends on what you’re doing – if you’re doing some action, you probably want to have it on fast.
If we swipe from the top, in the top left corner you have some display information. You can flip the screen if you wanted to, if you had the camera gimbal inverted. You can also have auto-lock after so many seconds – it’s going to lock the motors and save your battery. Here we have the brightness while the camera is locked. We have it at 50%, which is fine.
In the top right corner, we have the Bluetooth connectivity if you’re able to make it work with the list of compatible cameras. The bottom left corner we’ve kind of taken a look at already, which is the focus motor calibration manual endpoint. This menu is pretty simple. I’m going to disable these points that we made earlier because now it’s being used for focus.
Auto-Lock and Silent Mode
On the bottom right corner are the overall settings. This disables the selfie mode where you triple tap on the trigger. I’m going to actually disable that – we never use selfie mode. The orbit follow is in case you’re doing an orbit around an object. This is supposed to make it a little bit smoother as you go around in PF and PTF mode.
The auto-lock is actually a really interesting function. On and off means that when you turn the camera on and off, if you have it on “recenter and lock”, the camera is going to look just like this. If you have it on “fold and lock”, when you turn off the gimbal it’s going to look like the RS3 Pro, kind of more lined up. Personally, if I’m shooting, I prefer to have it in “recenter and lock”. If I’m folding the gimbal, then I can do this manually to make it look like this before I put it away. You can also do nothing and kind of let it float being unlocked if you turn it on and off.
Going back, sleep mode is the same thing – what happens in sleep mode? Does it go into “recenter and lock” or does it just stay kind of floating around with the motors turned off?
Going back into the main menu, we have the silent mode which kind of silences the motors a little bit, although I have to say I have not found that they are extremely loud when they’re in non-silent mode.
Push Mode and Calibration
Then you have the push mode. This is pretty cool. We can push pan and push tilt, meaning that when we go right here, I can move the motors to whatever position I want, either on the tilt or on the pan, but not on the roll. So be careful on the roll – it’s always going to come back to the main position. I’m going to turn this off and turn this off. Double tap right here to recenter. There you go.
Going back to the next menu, horizontal calibration – this is cool if you’re having an issue with horizontal calibration, which we did for a while in one of the video shoots. You can go in here and do the horizontal calibration. It’s going to take a few seconds, but when you’re done it should be nice and level. But if you’re not, you can also do it manually by clicking “tune manual” here and then adjust your levels. We had to put it at -0.03 when we did this during the last shoot.
Going back, we have the gimbal auto-check, which is the full check of the gimbal itself. It’s going to go up and down and left and right to make sure everything has been done correctly. I’m not going to do it right now, but this is something that’s very useful if you want to make sure before a shoot that you’re all good to go. That’s how you would do it. Everything else is kind of secondary information about the device, firmware, and all that good stuff.
Joystick and Dial Settings
Now getting out of this menu, scroll from the bottom up, and then we can do that again from the bottom up. We have another menu hiding here – joystick speed. This is how fast the joystick in the back is going to be moving. Based on my testing, this does not have any effect on the zoom. I think it’s only when you have it with the button down right here where the camera tilts up and down. We can have it so that it moves a little bit smoother. Slow is probably not a bad setting if you’re getting started.
Then we have the joystick smoothness here, which is also going to say by the time you move this, how much input are you giving. Medium is not a bad setting either. Again, it depends on what you’re going to be recording.
And then the dial function – we talked about this already. Here you’re going to select what the dial in the back is actually going to do. Right now we have it to control the motor, and we have some more settings in this bottom right corner with the fact that you can reverse the dial and change the speed of the dial as well.
Custom Functions and Focus Motor
Now from here, you can swipe from the right to the left to have access to another set of settings. If we click on the M button, we can have it either take a photo or do a custom function. Now, I’m not going to lie, I don’t know where you set that up. I don’t know if it’s because we have a pre-release version at the moment, but I have not been able to customize this button. So I’m going to leave it on “take photos”.
And we have the focus motor. It’s set on low right now. Obviously this speaks for itself – how you want to set that up.
Trigger Settings and Accessories
And then lastly, we have the press and hold trigger. What does it do? We have it on “gimbal lock” right now, which means that if you press and hold the trigger back here as you are holding the camera, the camera is going to stay where it’s at. This is great if you wanted to do a side shot and keep the camera aiming in the same exact direction. You can also have it so that when you push it, it temporarily switches to the FPV mode. And this is it really as far as functionalities. This is the whole entire gimbal right here.
You can add accessories on the side. You’ll notice we have one in the front here with a 12mm rod. This now takes 15mm rods, which is a nice change and more industry standard. You also have this carrying handle here in order to go into the briefcase mode, I think it’s called, where you can easily slide it on the side here and tighten it. You can play with this – it’s got different options, nice and tight. And then here you can change where the angle of this handle is going to be. So it’s pretty versatile, quite frankly.
DJI Ronin App
And then lastly, there’s a whole app that comes with this gimbal. It’s the DJI Ronin app, where you can go and control the camera in a lot of different ways, including a virtual joystick which is going to allow you to go up and down and left and right, or even tilt the camera at will. This is great if you want to do this from a distance.

We also have the ability to do the Force Mobile, which is really cool. Now you’ll notice it’s turned off by default, which means that once I turn on Force Mobile, hold the phone in the position where you want the camera to be neutral, and then turn on the Force Mobile. Now you have the ability to go up by pitching your phone up, and then left by yawing your phone left and right.
If you also wanted to add the roll, then you would do the roll like this. Some people don’t like the roll because it’s not a really natural movement, unless you’re flying a drone FPV. So most people turn off the roll, and then in this case, all they have to do is yaw the phone like this and then pitch up and down. I have to say, it’s extremely reactive, but every once in a while you have to re-center and refresh. You’ll notice right here, the phone is a little bit tilted even though it’s not here. So you would just do “recenter” and then you’d be good to go again.
Now you can go back and also create panoramas from here. You can do time-lapse. All of these are going to allow you to create different points on the screen where the camera is going to go from time to time, how long you want between each of them. You can do that instead of a time-lapse. You can do that as a track functionality, so the camera would go here for so many minutes, and then go here, and then here. Also very great if you’re maybe on a set or trying to do a very specific movement, repeat it over and over again.
You can also use a controller, like a PlayStation 4 controller, in here to control the gimbal. We’ve done that multiple times. You can also use the focus control, which would move the focus wheel that you have set up. And then if you move the phone sideways, now you have control of the gimbal itself and also of the focus or the zoom, depending on how you’ve set up your system. So you could zoom and tilt up and down and pan, do all that, and also control the camera directly from the app.
Likes and Dislikes
Now you might be wondering what I like and didn’t like about this gimbal. Well, first off, I like the size factor. I think this is great to have it between the mini and then the RS3 Pro, which was a little bit bigger. I think this is the right size. Also, I think it’s very comfortable to shoot for long periods of time. The people in my team would tell you the same thing, because we recorded a couple videos using this as a test, and that’s what they said.
The ease of use is also one of these things where all of the menus being in the back right here, nice and accessible, and then the ability to have those two motors connected, which was also a great plus.
Now also, the battery life is pretty good. This is 12 hours with this battery pack. They’re also supposed to be coming up with a much bigger battery pack that would last for 24 hours. I don’t know why you would need that, but maybe if you’re traveling somewhere, I don’t know.
Also, what I really didn’t care for was the calibration. We had a few issues keeping this level during one of the shots that we had. Still trying to figure out exactly what happened.
And then also, when you open the package, the size of the gimbal is much smaller than what we were expecting. So this may not be able to support a much larger camera. Like I said, 3 kilos, 6.6 pounds maximum capacity. If you need something bigger, then the Pro version is likely going to be doing it for you.


+ There are no comments
Add yours