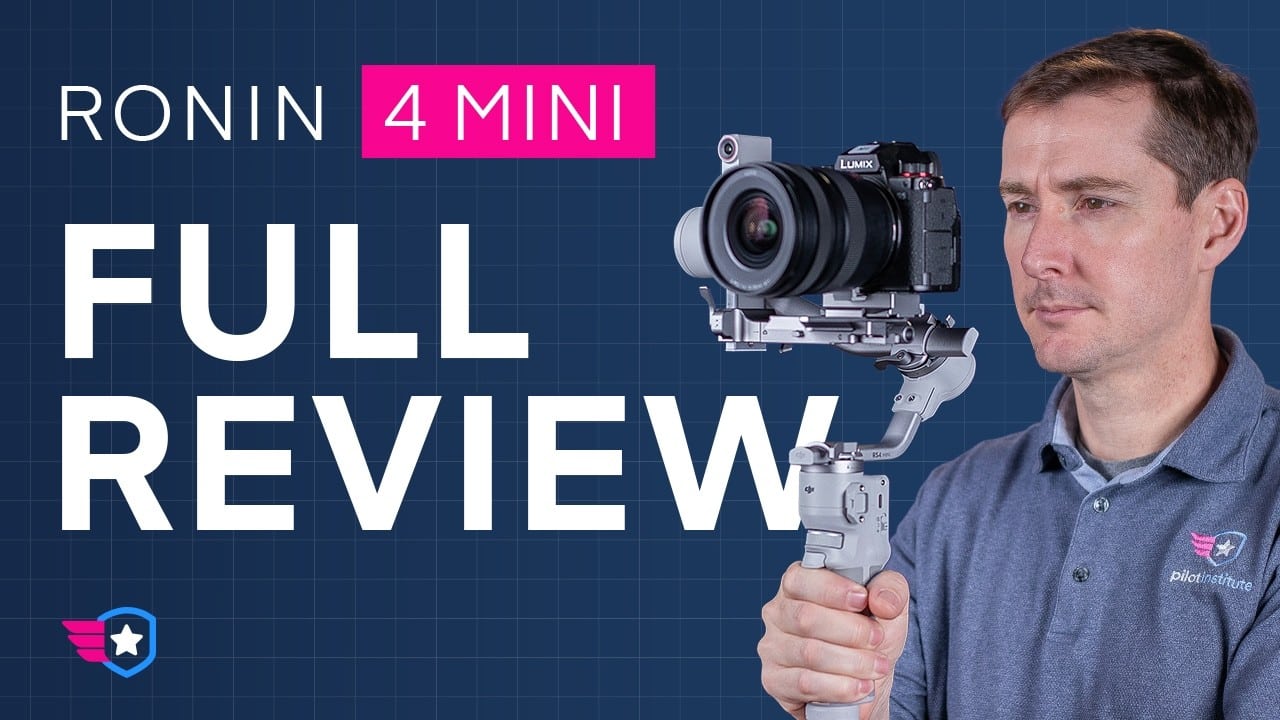
In most of our videos, we use a static shot like this one right here on the tripod. We also use a lot of drone shots like this one right here. But if you’re only using these two options, then you’re missing out on something very dynamic—a gimbal shot like this one can really up your production value. Today, we’re reviewing the DJI RS4 Mini. Let’s get to it.
Our Experience with Gimbals at Pilot Institute
As you can tell, at Pilot Institute, we love using gimbals. We’ve been using them for a long time, starting with the original Ronin, actually. We also have this one right here on the jib—that’s the RS2 Pro, RS3 Pro, and RS4. We have the RS4 Mini on the smaller side of things. We also use a smaller version when it needs to be more portable. We have this one right here, which is the Pocket 3, and we have the Osmo Mobile 6. Yes, it took me a couple of tries to get all of them. Finally, we have this one right here, which is the DJI RS4 Mini—the latest and greatest from DJI. As you can tell, it looks a little bit different; it’s a different color. We don’t love the color—I mean, I don’t love the color. I think, personally, it’s going to get a little bit too dirty. But it comes with a ton of accessories, so we’re going to dig pretty deep into this new gimbal, tell you how it fits in the line of all the other ones, and then if this is something that should work for you.
Unboxing and Initial Setup
Let’s talk about all the different parts and then put them together. When you get the gimbal, this is what it’s going to look like. It’s pretty cool—it’s got the auto-lock function, which we haven’t seen in a mini format. We’ve seen them before on the more pro versions, the larger ones, which means that when you turn it on, it’s going to basically unlock, and when you turn it off, it’s going to lock itself off easily. Then we have this little tripod here. I recommend that you put it in—very simple—but it’s going to help you, like these other gimbals, to be more stabilized on your work area as you set it up.
Now, when you get the gimbal out of the box, it will come with this plate right here and also the plate that you’re going to mount to your camera. This is our Panasonic S5; we’re going to be using that as an example. You’re going to mount that to the bottom of your camera, and then you’re going to slide this in. There’s only really one way that you can put it in, so you’ll find if you’re doing it the wrong way. Then you have a little wheel right here that you can turn to do a minute adjustment, and then you can lock it—just like all the other places in here where you have something that slides. We have the ability to lock it. Make sure that it is locked in place before you go any further.
Strength and Compatibility
Now, don’t be fooled by the small size of the gimbal. It is actually pretty strong—it will be able to hold 4.4 lbs, which is the same thing that we saw on the RS3 Mini, not as much as the 6.6 lbs that we see on the RS4. But there is a list of compatible cameras that are available that will work with this. Now, you can mount any camera that you want on here, obviously, but if you want to plug it in and use some of the functionalities in here that are in the camera and have the gimbal talk to the camera, then you’re going to have to make sure that it is part of the compatible list.
Now, depending on the camera that you use, you will have more or less compatibility with the settings in here. For example, on the Lumix S5, we can start and stop recording, we can change the ISO, and change the aperture, but we can’t do the autofocus. Now, we’ve tested this with several cameras, pushing it to the limit, and we finally were able to overload it by using the Blackmagic Pocket 6 that we use inside of the studio.
Balancing the Gimbal
So now I’m going to show you how to balance this thing. Now, in the interest of time, we’re going to put a link right here to the full video from DJI on how to do this. But by the time we’re done, you should have a balanced gimbal that doesn’t move around and that’s ready to be turned on. Now, let’s make sure that I did a good job. We’re going to turn on the gimbal—you can hear it, the beep—and you can see in the top right corner on the back screen that there’s a green symbol that says that the camera is balanced. You can actually tap on it, and it will show you if the motors are working a little bit more. You can see that on my roll to the left, I have a little bit of motor work, so that means that I would have to use the back right here and kind of slide it again until that goes away. I’m okay with that at the moment, so we’re going to move on.
Vertical Shooting Feature
I want to show you something really cool with this gimbal, which is the ability to mount the camera vertically. I turn it off—you notice it went into the full lock mode—and then the cool thing is, in the back right here, we can unscrew this button and then push on it. As we push on it, the whole plate comes out—not just the plate that was attached to the camera, but the whole plate comes out right here. Because look what we can do now: we can mount it—there is a hole at the bottom—and we can mount it and lock it back in place, and now our gimbal is vertical.
Now, if I turn it on right now, it’s not going to like it because it needs to be rebalanced. You need to rebalance every time that you do a new setup—this counts as a new setup. You also are going to have to move things a little bit around. You notice that here the camera touches, so that means that I have to move my camera tray right here a little bit more to the left in order to give it more room to move. And there it is. So, at the end of the day, once you’ve redone your balancing, the camera should show up right here. If you do a lot of vertical shooting, then that’s the way to do it. If you have two of these gimbals, set one up vertically, set one up horizontally, and then you have two different ways to shoot very quickly.
Using a Phone with the Gimbal
The next cool feature that we have is the ability to use a phone instead of using an actual camera. The way that you do this, you’re going to have to remove the two plates at the same time. So the way that you do this is you’re going to unlock the bottom tray here, and then you’re going to slide it out of the way. You notice I have the one that was attached to the camera and then the one that was attached to the tray right here. Then we’re going to put it back into our flat mode—horizontal mode instead of vertical mode—so here’s the tray, and we’re going to put it right here, attach it.
So technically, that’s how your gimbal works, right? And then now we’re going to take this, and we’re going to slide it in place right here, and now we can lock it. And then now we can attach our phone and clip it in here, and then now you have full control, and you can see what’s going on on the screen.
Magnetic Tracking Module
The last item I want to talk about is this tracking module—it’s a magnetic tracking module. Magnetic is the way that it mounts to this camera—there’s no screw, there’s no bolts, it’s basically just clipping right here. You notice how quickly it went, and then you squeeze on each side right here to take it off. If you put it in the wrong direction, it just won’t let you do it—the magnet just doesn’t work in that direction. What does this do? This will allow you to track someone by doing gestures, and I’m going to show you in this video how we do this in a minute.
Navigating the Menus
Let’s go ahead and talk about the menus in the back of this thing. There’s a tiny little small screen—1.4-inch LCD touchscreen—in the back, very similar if you’ve used any of the DJI gimbals in the past, at least the more recent ones. The menu hasn’t really changed all that much. Now, before we get into that, there’s a couple of buttons in the back. There’s a joystick that you can use—now, depending on how you have set up the camera, then it will either move the gimbal around, going up, going down. And yes, you can reverse these buttons so that when you push the camera up, instead of going up, the camera actually goes down. Some people like it reversed, or whatever you want to call it—inverted. It depends on your style. And then you can go left and right—you can also change the speed. I’ll show you how we change the speed of these settings.
We also have the record button—if your camera is compatible or if it’s plugged in, you’ll be able to do that. And then, on the right side, we have a PTF, PV, and FPV button. PTF means that you can move in all directions when you’re holding the camera. If you pitch down, then the camera is also going to pitch, and if you pitch up, the camera is also going to pitch. It’s going pretty slow right now because I have it set as fairly smooth, but if we also go to the left, then it’s going to go to the left. Now, if I go in this direction—you notice I reached the limits here—if I go in this direction, nothing happens. Why do I say this? Because if we move it to the bottom one, which is FPV, as I go and roll to the left and to the right, the gimbal is also going to roll. This is if you want a really immersive mode where it’s FPV—first-person view—where if you’ve ever seen drones flying in FPV mode, that’s what it is.
And then the last mode in here is called the PF mode. In PF mode, you’re going to be able to pan just like this, and then if you pitch up and down like this, nothing happens—it stays basically at the level at which you have put it. So, no pitching—just basically this pan right here. If you want to pitch up or down, then you’re going to have to use the joystick.
And then, on the left side, we have another button, which is new, I think, to the RS4 series, where we have the ability to either use the joystick for moving the camera—controlling the camera—or if we push it up, if you have a camera that can zoom, then the joystick now becomes a zoom in and zoom out as you push up and as you push down. This camera is not compatible—I don’t like using that anyway—so this is a good mode right here to be able to use it.
Touchscreen Options
On the back of the camera, on the touchscreen, there’s four different icons. The one on the top right, I mentioned already, is whether or not the gimbal is in a good state. You can click on that, and it will show you which of the motors is working as far as the balance is concerned. On the top left, we have the ability to do a calibration. If I start a calibration, it’s going to start doing this right here, which is kind of shaking to make sure that it senses if the camera is calibrated correctly. It’s going to go through that process—it takes a few seconds—and at the end of it, it’s going to give you the results. It says, “Gimbal calibration is complete.”
On the bottom left corner, we have PTF, which tells me that I’m in PTF mode. Now, if I move that switch, then it’s going to change that reading—that really is just for indication purposes; changing it is only done via the button on the side. And then we have “Smooth.” You can see when I click on Smooth, we can have “Smoother” or “Responsive”—this is how quickly the camera is going to react to things. So, I have it on Responsive now; I have it on Smooth—notice how much smoother it is. As I make a change, it takes half a second to basically move on to the next thing, whereas if I go to Responsive, it’s almost instantaneous—the camera is reacting.
And on top of it, we have the speed at which we can go. So, I can go to Medium all the way to Fast. So, if I have it on Responsive and Fast, what’s going to happen is that as soon as I move—you notice it’s pretty much one-to-one—it’s super sensitive, which means that, well, depending on the type of work that you do—let’s say you’re chasing someone that’s fighting or running, and you really want to be in the action—this is probably the best mode. Put that in FPV mode, and then in super responsive, and it’s going to do a great job. You can still go in Fast and Smooth, which means that there’s still a little bit of delay as you turn around, so it’s a little bit smoother. When I stop moving, you notice that the camera doesn’t stop immediately. So those are great modes—personally, I like it to be in Medium and Smooth, but that really depends, again, on the footage.
Hidden Menus and Settings
Next thing, we have a bunch of menus that are hidden. We can start to scroll from the bottom to the top, and you will get to the joystick settings. So, we have the joystick speed—same as me moving around here—except now it’s about the joystick. I have mine on Slow because I like to go pretty slow when it moves down. And we have the smoothness, which is—what does it do when we start pushing, and what does it do when we’re done pushing? If I have it on High as far as smoothness, you’ll notice that when I let go—you see how long it takes to slow down—this is good if you want to be extra smooth, and you don’t really care about how it ends at the very end because you have to be very precise. You have to stop at least a second before it really stops itself. So, between the joystick speed and the smoothness, you can really make it extremely smooth myself—but that’s really the term here.
And then we have the dial function—the dial is this thing right here in the back—and we can set it to different things. I’m going to plug this in—I haven’t done that yet. We’re going to plug it to the back of the gimbal—not the back of this intelligent tracking sensor here, just the back of the gimbal up here—and I’m going to plug it to the side of the camera here into my camera control. Now, what this gives me when I turn on the camera is it gives me the ability to do several things. I’ve mentioned already that the Bluetooth option is not available on this camera, so I’m not going to worry about that. But my ISO changes and gets more sensitive—or the other direction, gets less sensitive. I can also set it to aperture—same thing—you notice my aperture goes up, and my aperture comes down. I can also set it to shutter—this is not compatible with this. We can also use it on Roll—check this out, this is actually really cool—I can have the camera roll right here as I’m moving the wheel. This is really cool if you want just a tiny little bit of roll in your footage, but you don’t want it to be too pronounced, or you don’t want it to be when you roll the camera like in FPV mode. This is a great addition.
You’re going to say, “How do you go back to normal?” If you double-tap on this button in the back here, it will bring the gimbal back to its original location. We also have the ability to pan doing this—so you can pan left or right—and then another one that I like—you can go and tilt. So this means that instead of using the joystick in the back to tilt up and down, if you have it set to PF mode, for example, I can go right here, and I can use this wheel to do maybe a pan right here on these objects, and at the same time, I can pan and I can go down on my items. Now, you could do that in PTF mode as well, but here you have a lot of control over how the camera moves up and down when you know you don’t have to worry about this—this is fixed, and it doesn’t move the camera. This is the only thing that changes the pitch on the camera—so something to play with. There’s no right or wrong answer here.
And we have the dial settings in here, which is the speed of the dial button in the back here, and you can also do a reverse dial. So, for example, here I had to go to the left to pitch down—you could have it so it goes right to pitch down. I’m not going to set it up that way.
Swipe Down Menu
So that’s the swipe-up menu. We have the swipe-down menu right here, where we have a few things. The first one is top left—that’s the display. We can auto-lock the display after 30 seconds, and we have the brightness of the display—so you can change that. It’s at 50% right now—plenty visible. I’m sure if you were outside, it will be different. Then we have our Bluetooth connection—there is an ability to plug in a phone to this in order to control the camera. I’m going to show you that in a second. And then there’s also a way to connect the camera itself to the gimbal—that’s if your camera is compatible. Make sure you look at the website to find out the compatible cameras.
Bottom left corner, we have the sound option—we can turn off the sound of the gimbal. So, if you’re on set and you want to make sure that you don’t have any sound coming out of this, you can turn that off. And then, on the bottom right corner, we have various settings in here. The selfie mode is if you triple-tap—so if I do one, two, three—the camera is going to turn around. Now I can take the camera and do a Potato Jet-style video—love you, Potato Jet—and triple back again—one, two, three—triple-tap—it’s going to go—oh, double-tap, I’m sorry—it’s going to go back to the front view. Now, I could disable that from the menu right here if I didn’t want to, by accident, click three times—that’s up to you.
We also have an option here for orbit follow—this is something that was also available on the RS4—which is the ability to help you as you do an orbit around an object; the gimbal is going to help. We have autolock features in here that can go after a specific amount of time, but also how it locks—right now we have it to fold and lock—you saw that animation. We can also have it to just recenter and lock—what it’s going to do is it’s going to bring the camera back to this normal neutral position here. Personally, depending on what I’m doing, I like the fold and lock when I’m about to travel, but as far as keeping the gimbal here in place when I’m on a shoot, I would prefer to do it this way with the recenter and lock—so that’s up to you.
We also have when it goes to sleep and what it does when it goes to sleep—in this case, recenter and lock as well. The next menu in here is the push mode—this is in order to push the gimbal in place if you wanted to do this by hand. I’m going to show you an example—if I do this right now, I don’t have any of the push modes on—if I push the gimbal, it’s going to try to return to its original state. If I have it on push pan, for example, and I turn that on, I can move the gimbal to where I want it to be, and it’s going to stay in place. Same for the push tilt—I can push it and put it right here—you hold it for a split second, and then it keeps the thing in place.
Horizon Calibration
So, there’s also in here the Horizon Cal vibration—what this is is the ability to make sure that your horizon is level. This camera, for example, has a level on it—I can tell that it is actually horizontal—but if I wanted to do a bit of a calibration in the event that it was tilting a little bit to the left or to the right—it happens from time to time—then this would allow you to do it. See, it’s moving around as I’m doing the calibration, and it’s going to make sure that at the end of it, you don’t have a crooked horizon, which is a bit annoying. You can also do it by hand by just adding a couple of degrees left and right—so I can slide this—you notice how it’s tilting left or right—if you want to do a manual adjustment. I’m not going to mess with it because it is actually level right now, and I don’t want to mess up our shots.
And then we have also the gimbal auto-check option in here—it says, “Make sure that the gimbal is balanced and held stationary before starting the auto-check.” When you do confirm, what it’s going to do is—don’t touch the table—it’s going to do its little shake thing, and it’s going to make sure that the balance is done correctly on the gimbal. It’s an “auto-check complete—gimbal status is good.” We knew that because we had the green little icon on the top right corner on the main menu.
You can turn on or off auto-off right here—I have it auto-off just to save the battery—and we can restore the parameters—you know what that means. We have language, device info, firmware updates—there’s a couple more things in here that are very typical for any kind of electronic devices. So, let’s swipe back up to get back to the main menu.
Active Track Settings
Then we have our swipe from the left to the right, which is giving us the active track settings. And the first one is composition—this is really interesting here. It says “keep current framing” or “center tracking subject.” It means that when somebody gets in front of it—remember this little add-on right here is going to help us keep the camera on whatever the subject is that we’ve selected—in this case, if we keep the current framing, let’s say that your object was on the left third or the right third of the image, then it’s going to keep it there. If you have “center tracking subject” selected, then it’s going to keep the subject right in the middle.
We also have active track speed—if you’re familiar with drones, which you should be if you’re watching this channel—the active track is the same idea as what you see on your drone. So, we have it on Fast right now because we were doing some testing—somebody gets in front of the camera, moves really fast—this is also going to move really fast to follow them. Then we have the ring light—which is that little light that you see right up here—I can turn it on or off—in this case, back on.
And then to turn on this tracking—this auto-tracking—you’re going to be doing gestures. So, to start and stop, we currently have it where you put your hand up like this, and it’s going to pick you up, and then when you’re done, you’re going to put your hand up again, and it’s going to stop. And then, if you want to take a picture, you’re going to do the pie sign right here—it’s going to start capturing the footage—and you’re going to do it again, and it’s going to stop. Now, you can change that if you want to—there is the hand symbol, we have the pinching symbol, we have the peace sign—so you can pick whichever one you want in order to tell the camera what to do using gestures.
Battery Life
Let’s go ahead and talk about the battery life for this thing, which is fairly impressive for being this small—13 hours. The RS4 was 12 hours, the RS3 Mini was 10 hours. Charging time is an hour and 50 minutes, but it does have fast charging—after a 30-minute fast charge, it’s actually going to run for 5 hours. So that’s really impressive—you’re in the middle of shooting a wedding, maybe you charge that for 30 minutes, you’ve got five hours to go. If you’re using the fast charging, it will tell you on the back if you’re using the fast charging by giving you that indication straight on the back screen.
Accessories: Tracking Module and Briefcase Handle
So, one of the flashy new accessories for this gimbal is this tracking module right here, which unfortunately only comes with the combo pack. So, you have to spend a little bit more money to get to it, but it has the ability to keep a human subject in frame up to 10 meters away from this subject right here. It has the ability to do a continuous pan rotation—it can rotate 360° with the subject while it’s tracking it. And the cool thing about it is that there’s no need for a cable—it really just connects directly using that connection pin at the bottom right here when you do the magnet attachment.
Another cool accessory that we have is this briefcase handle—this is also available in the combo pack. It comes with the ability to mount anything with a cold shoe right here—there’s two of them on each side. You could technically mount the receiver for a microphone—DJI mic—and then you could put the transmitter for the DJI mic right here. And as you mount this to your gimbal, then you would be able to hold the gimbal and also talk at the same time right here into the microphone—so a really neat little update. Also, I appreciate the touch where there’s a hole right here to put the USB cable to go and connect it directly without having to remove this handle. And then there’s a quarter-20 right here as well if you want to add a rosette or anything additional.
This briefcase handle—you can change the angle of it depending on how you like to hold it—so very, very useful. You can also put this little tripod right here at the bottom if you needed to, or attach a tripod head or whatever it is that you want to add right here. But yeah, very, very useful—like I said, only comes in the additional pack. This is also very useful if you want to do something very low to the ground, and you want to really get down right here and hold the camera without having to just hold it from the main grip—that’s a great way to do it. So, like I said, only comes in the combo pack, unfortunately.
Using the DJI App
Another cool thing that we’ve seen with other gimbals from DJI is the ability to use the app on a phone right here to control the gimbal from a distance. This is very useful if you want to be kind of behind the scenes controlling and you don’t want to be just right next to the gimbal. The way that you do this is you’re going to have to find your gimbal—RS4 Mini in our case—and then find it in the list. Once it’s turned on and you have your Bluetooth turned on, it should show up on that list. You can click on it—it will connect—and then we have the ability to do different things.
Starting from the top, it says “Create,” and when you create, this is where you have access to some controls. The virtual joystick here is pretty cool because you have the ability to use this bottom joystick and move the camera around—you notice as I go left, as I go right, I go up, I go down—and it tells you where the camera is kind of located at this point in time. We can also do the roll using the bar that’s right on top of it—it rolls left, it rolls right—and you can push “Recenter” to bring the camera back. Obviously, you can change the speed and smoothness on each of the axes, which is really cool because if you want to do something that’s really nice and smooth, you can dial this in right here before you start recording.
We can do the “Force Mobile”—I really like this one as well—so we’re going to have to enable Force Mobile to get started. So, watch what I’m doing—I’m going to keep the phone right here, I’m going to have it vertical, kind of on the same plane as this gimbal, and I’m going to push Force Mobile right here. And now, when I rotate in one direction—pan—it pans. I can go down and up, and in some cases do the roll—you notice it says zero on the roll right now. If I bring the roll on each axis, then I can fully control the camera—so this is really cool and very responsive. Look at the speed at which it’s doing it—and you can do different speeds again—pan, tilt, and roll—and then you can also change the smoothness if you wanted to. So, if I wanted to do a tilt that’s a bit smoother and the roll that’s a bit smoother, then I can do that—you notice that as I stop, it takes a few seconds to also stop. This is really cool—it’s always fun to play with. I haven’t really found a way to use it in real life, but it is something that’s available. When you’re done, basically just get out of this or turn off—unclick that button—you’ll be ready to go.
Panorama and Time-Lapse Features
The next thing that’s really cool is the Panorama function. Now, this is really useful if you are doing photography and you wanted to just take a couple of shots. You can set the sensor in here—it will help it to know how many pictures it needs to take to put everything together—focal length, overlap, how much overlap you want between the different things, and then the interval between taking all these pictures. And what you notice in here is we have the ability to grab the corner—so if I grab the corner all the way to the left—notice what the camera is doing—we have 180 degrees. And let me bring it down so to really explain how this works—180 degrees, the camera is now facing me. I can go to right in the front right here—the camera is facing you right in front of me—and I can go all the way to the right at 180 degrees, and it comes back to me. So, if I set my endpoints to be at negative 180 and positive 180, then it would be doing a full 360 degrees. Same thing for the top—I can bring the camera all the way 90° to the top at 0 degrees—think about it like latitude and longitude—and then we can bring the camera all the way down to a 45° angle down right here.
So, if I wanted to do a panoramic that’s 360 and that goes 90 degrees up and 45 degrees down, then I would select the entire area right here, and then now the camera would take that picture. You notice as I’m moving this, that little yellow icon is the camera and where the camera is actually pointing in space—so this helps you really to figure out. And you can also move it by hand—so you can maybe go like right here, select that corner, and you can say, “Okay, that’s my bottom left corner.” Then I can click on the top right corner and bring that top right corner down, and I can say, “Okay, this is my endpoint right here for the camera for my panorama.” Oops—let’s just bring the camera down towards it right here—there you go. And now it’s going to be able to take this panoramic—it’s going to do 4×3, 12 pictures total—and then we’ll be able to put it together in our software.
I can go back—I can do a time-lapse—same exact idea here with the time-lapse. You can set where you want the camera to move and by how many degrees by creating different points. And then we also have the ability to do a track—this is the same idea as the time-lapse except we can set different points on the app here. So, I’m going to do—let’s do it this way—I’m going to bring the camera—I wanted to start right here—I’m going to push the plus button—that’s my Waypoint number one. I wanted to then go to Waypoint number two right here, and then I wanted to go up to Waypoint number three right up here. I can go back to Waypoint number one and it says stay there for two seconds—okay. Waypoint number two—how long did it take to go between one and two? Let’s make it pretty quick—let’s make it one second—and then we’re going to stay there for two seconds again. And then let’s say we want to go pretty slow—let’s say we take five seconds to go to the next point—and then let’s do a preview. So, it starts down here, takes one second to go there, and then another five seconds right here—you notice it didn’t do the wait between each of them. But if you had a shot that you want to do over and over and over again, this is a great way to do it because it will just keep repeating, and then you can be the subject on the film that does whatever.
Game Controller Integration
And the last thing that we have is really cool—we can use the game controller here. It’s very simple—you would have to get a PS4 controller or an Xbox controller—this is a cheap knockoff PS4 controller—and once you turn on the controller, you have to use Bluetooth on your phone to connect it, and then you’ll be able to control the gimbal. The rest of the options in here are pretty straightforward—the balance tests we’ve talked about, the motor parameters is what you see in the back of the screen. The user profile is also pretty useful if you want to have specific modes—if you want to, you have the ability in the back of the camera here with the M button to change between those different modes once you have them configured. This is helpful if you have a mode where it’s “Run and Gun” really fast—like a fighting scene—or if you want to do something a lot smoother—like having it on the jib, for example—so up to you how you want to set those up. And then there’s a final status of the gimbal itself—these are, like I said, pretty standard if you’ve ever used this line of gimbals from DJI—this is something that you’ve seen.
Pricing and Final Thoughts on the DJI RS4 Mini Gimbal
Let’s talk about the cost of this gimbal—$369 for the standalone kit—that includes the gimbal, the quick-release plate that we talked about, the mini tripod, the L-shaped multi-camera control cable—we also have a USB-C charging cable—and then one screw kit. And the combo kit—$459—that’s going to add the intelligent tracking module right here as well as the briefcase handle.
Now, overall, I think this is a great gimbal that has a lot of great use cases. If you want to spend a bit more money, here’s a video right here on the RS4, which may give you a little bit more power. Let us know what you think in the comments—if you’re going to get one, if this is something for you. I hope you appreciated it, and we’ll see you in the next video.
Discover more from DroneXL.co
Subscribe to get the latest posts sent to your email.






+ There are no comments
Add yours