


What’s going on guys? Billy here and this has got to be one of the most anticipated drone releases in quite some time. DJI has finally released their Avata 2 and let me say it was well worth the wait as this drone improves on every aspect of the original Avata drone. This means that everything, from the design to the specs and the performance, has been made better. We even have a brand new set of goggles, a brand new motion controller, and even a brand new FPV remote controller.
DJI’s FPV line of drones have become really popular as people want a different experience than what the traditional DJI Mavic drones have to offer. It is a completely different way to fly as the thrill of high-speed movement when you’re strapped inside of the goggles is pure adrenaline.
It’s also given videographers like myself a brand new tool for capturing different styles of aerial video. DJI ready-to-fly FPV Drones make it super easy to learn how to fly in full-manual as all of the fail-safes of a regular DJI drone are built into this platform. Nonetheless, a lot of people have been chomping at the bit for a second version of the Avata and here we finally have it.
Okay, we have a lot to unpack here, and for that reason, I want to highlight the timestamps of this video. I’ll put them up here on the screen. I’ll also have them down in the description, and you can see them as you scrub along the video in case you want to jump around as again we’ve got a lot to talk about. But I think the best place to start is with the drone itself, the Avata 2.

DJI Avata 2 Design
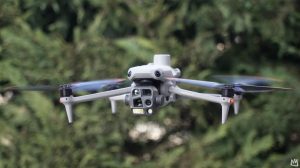
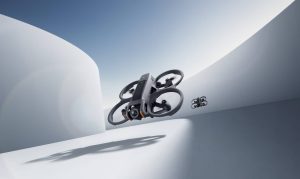
So the first thing I said when I took this drone out of the box was “damn!” It looks like a much more refined version of the original Avata. The body design has these curvy lines that make the propeller guards and body feel like one big piece, which makes for a badass-looking drone, but makes me wonder about its repairability.

Even though the Avata is known to be pretty resilient (I know with the Avata 1, I’ve slammed it into a metal pole, I’ve crashed it into trees, and all I need to do is pick it up, dust it off, and keep flying), accidents do happen and sometimes you’re going to need to fix some stuff. I see that there are lines in the body in some areas with a bunch of screws all around, so replacing parts as needed is definitely a possibility, but to what extent is still up in the air at this point.

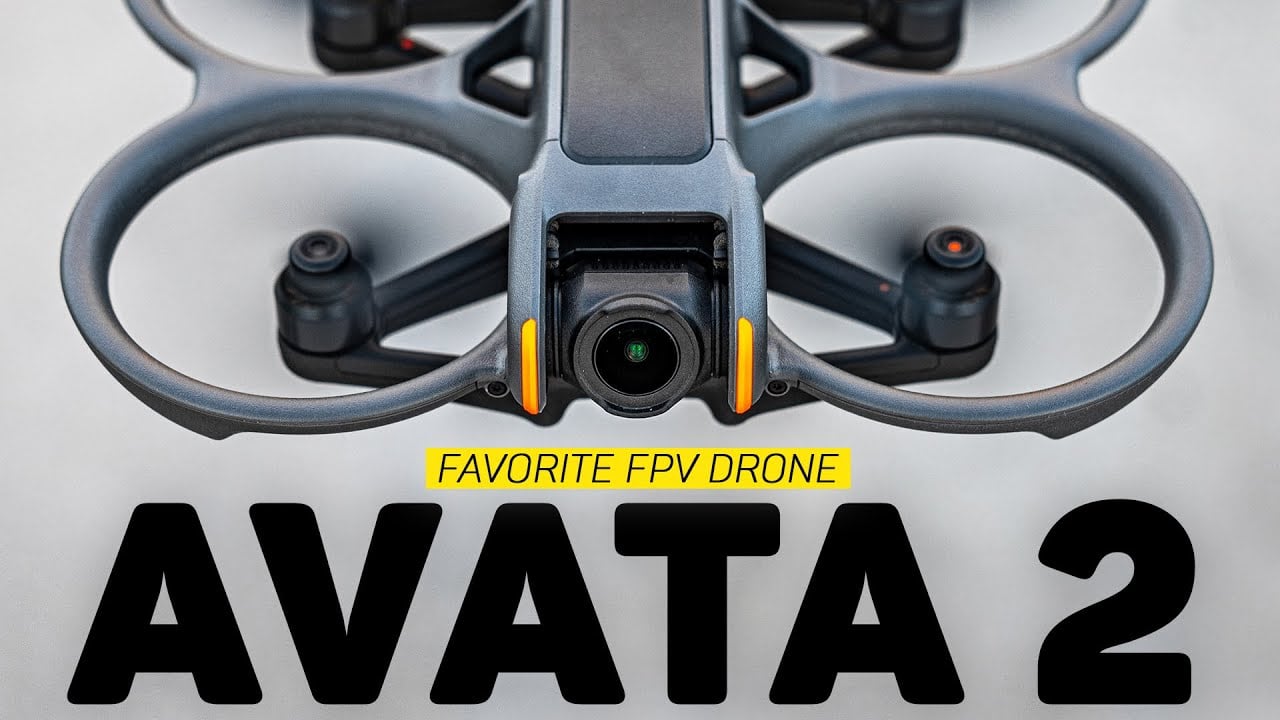
So overall, the design looks more refined and elegant than the original Avata but still keeps the same classic cinewhoop design with the propeller guards built in, the camera on the front, and the battery that slides in the back.

Some notable highlights that I want to mention though is the gimbal guard, which I think is the easiest to remove and install to this date on any DJI drone. Just like the original Avata, the camera also sits just behind the frame of the drone, so it should stay very well protected if you happen to run into something head-on or if the drone hits a tree and then tumbles out of the sky. This is a great touch, as the gimbal and camera are probably the most fragile thing on this drone.

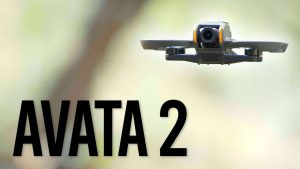
I also want to highlight the improved clearance underneath of the drone. The original Avata’s motors and propellers were so close to the ground when taking off or landing that it made hand launching and landing basically impossible, not to mention it was tough to take off from the ground if you didn’t have a perfectly level surface. The new Avata sits higher off the ground which now makes hand catching very easy and gives you more clearance.

But what I’m probably the most excited about is the placement of the USB-C port and the microSD card slot here right on the side. It is super easy to get to and if you remember where they put those ports on the original Avata, you probably remember how frustrating it was to get your card in and out of the drone. This placement though on the Avata 2 is worlds better.

The final thing I want to point out is the sensors on the bottom and backside of the drone. Tucked underneath is the typical vision positioning sensors that help the drone hold its position in the air.

There’s also a set of backwards sensors here that look like obstacle avoidance sensors, but they aren’t. There is no obstacle avoidance on this drone. Instead, it’s just another set of sensors to help the drone with positioning and stabilization in the air.


DJI Avata 2 Performance
So yeah, the Avata 2 is a great looking drone. It’s sleek, it’s rugged, and it’s also very quiet thanks to the new propeller and motor design. I’m not sure if you remember how noisy and annoying the Avata 1 was, but this new drone is whisper quiet in comparison. The pitch isn’t as high and even when you give the drone some throttle, the noise is much more bearable.
So yes, overall this is a much welcome change and so are the rest of the specs like the improved flight time, the improved image transmission system, and more internal storage amongst other things.

The flight characteristics of this drone have surely been improved as well, as the difference in power and performance is noticeably better than the original Avata. It’s hard for me to describe in words or even through a video, but the drone feels more stable in the air and less wobbly. As cinewhoop drones can have a tough time fighting through wind and other variable conditions, but this new drone doesn’t seem to care and just keeps cutting through the sky.
A good way to help you understand the stability of this drone is to show you the view directly through my goggles. As you know, what you’re looking at in the goggles, in this case, is not stabilized and this allows for the lowest latency possible.

So what I’m looking at through my goggles is what the camera sees as it’s flying through the sky, again with no stabilization added, and you can see it looks fairly smooth even on a somewhat windy day. Even though the maximum speed of this drone on paper hasn’t improved, it surely is capable of getting after it, which makes my experience flying it more enjoyable. It makes it overall more usable.
Probably the best improvement on this spec list here for me though is the flight time. I’m consistently getting over 15 minutes of real-world hard flight time, which for a cinewhoop is very impressive.

DJI Avata 2 Camera
What’s probably been the biggest all-around upgrade in my mind though is the camera. While I have you here, I’ll include these specs as well so that you get everything here in one shot.

This basically takes the Air 3S camera and gives it a wider field of view for a more immersive flight experience. Everything from top to bottom has been improved from the original Avata – the sensor size, the resolution and frame rate options, the stabilization, even the color profiles with the addition of D-Log M that unlocks 10-bit color have been overhauled.

Looking at these specs are great and all, but you really can’t quantify how good a camera is by just looking at some numbers. There are of course other important factors like dynamic range that you need to evaluate by just looking at the video, and I have to say this right here is probably one of the biggest upgrades introduced with the DJI Avata 2’s camera.
There have been so many times that I’m flying into the sun or into a tough lighting environment, and when I look back at the video from the SD card, I am amazed that the exposure is so even. Take this clip for example of this water tower. This is backlit with the sun right behind it, in fact it’s sitting in frame, and the Avata is able to perfectly expose the dark side of the water tower. You can see some definition down there in the trees and you can still make out the blue up in the sky.

As I said, there are plenty of times when I’m ripping around that I encounter areas where the light conditions quickly change from light to dark or vice versa. There are times where I look right into the sun and there are times where I might have to deal with a harsh set of shadows or highlights that would really be difficult to expose for.
This new camera on the Avata 2 however makes dealing with all of these problems a non-issue. I just leave the camera set on auto, let it do its thing, and I’m happy almost every time when I go back through my video that I’ve captured.
This improvement in dynamic range and exposure also makes the general flight experience great. Like when I’m inside of the goggles and I’m flying, it makes picking up little details very easy. Even as I mentioned, going from light to dark spaces or vice versa has a nice exposure roll-off so that it looks natural in my final video, but also is easy on my eyes when I’m flying and gives me enough reaction time to not crash.
In the same vein, when I finally get all of this video off of the SD card and into my editing software, Final Cut Pro, the footage is very malleable. It’s easy to work with. I can push the exposure around. I can push the colors around, and it doesn’t fall apart and become grainy.
So not only does the dynamic range look great out of the camera, it’s also really easy to work with in post, which just makes flying this drone and capturing video with it so easy.
Another improvement that has made a big impact on my workflow is the ability to capture 4×3 video in 4K at 60 frames per second. The original Avata only allowed you to capture 4×3 video in 2.7K, which was a letdown because I prefer to have the extra room on the top and bottom of the frame. I think inside my goggles it’s easier to fly with that extra screen real estate and I can keyframe my video when I crop down to 16×9 to counter any changes in throttle input.
Not to mention, if I want to share this on social media platforms where videos are best shared vertically, I can easily crop right into the center of this frame with the extra top and bottom pixels.
Overall, this camera is so good from a dynamic range to a stabilization to a color and sharpness standpoint that I have absolutely no desire to put an action camera on top of the Avata 2.
It took DJI a little while to master using one camera for both FPV flying and high-quality video capture, and I think that they finally reached a perfect blend with the Avata 2’s camera. I’ll leave a link below so that you guys can download some of this footage for yourselves to see in its full resolution. It’ll really help you appreciate all of the detail and dynamic range that this camera has to offer.
Improved Image Transmission System on the Avata 2
Okay, now let’s switch gears over to another big improvement made to this drone and really all the peripherals you see here on the desk, and that is the new image transmission system. The Avata 2 here is running O4, which means we get more range and more penetration, two things that any drone flyer will love, whether you fly GPS camera drones or FPV.
To give you a real-world example, my first flight with this drone took place out in Kanja Hawen at a commercial building that was being torn down. For reference, I was standing here towards the apartment buildings, and about 1,000 ft away was this big concrete and metal structure.
During this flight, I was able to fly all the way over to these buildings and explore inside with no drop in signal. The only thing that dropped substantially from this far distance and heavy object density was the transmission bit rate, but the video feed held up really strong with no breakup and no lag.
I even tried taking this little drone on a longer range mission down the Schuykill River to check out their progress on the construction, and the video feed was as strong as can be from a few thousand feet away.

It’s no secret that DJI’s image transmission system is the absolute best in the drone game, and now that they’ve made this upgrade from O3 to O4 in most of the drones available, it really just makes me wonder how far they can continue to push the image transmission system. How much further can we fly? How much better penetration can we really get?
I know that with this upgrade from O3 to O4, we now have more antennas in both the remote controller and the drone itself. So not only do we have a much better protocol running between all these different devices, we now have more antennas to give us a much stronger signal. I would say that as of right now, signal strength is just not an issue with the Avata 2. It really is as good as it can get.
Ease of Flying
The thing that makes the Avata 1 as well as the Avata 2 such a special drone is the fact that you can fly it in full manual, full acro. You get full control over the drone, but you still have some of the secret sauce that DJI has put into their drones, and in the Avata 2, which makes it super easy to fly.
This includes functions like a brake button, altitude hold, return to home, and so many of the other features that DJI has pioneered to make flying their drones as easy as can be. For instance, the Avata 2 can be flown just like a traditional GPS drone from DJI. I can take off, it’ll hover in place, and I can cruise around without the worry of flying it in full acro mode.

If I was instead flying in acro mode or full manual, I could return to a hover by pressing the brake button, and it’ll come to an immediate stop. This lets me regain my bearings and then pick back up in manual whenever I’m ready. I overall love the ability of just flying in sport mode because I can take off and land with ease. I can also take a brief pause while in the air to say, remove my goggles if I had to, and I would know that my drone is staying in position safely.
It also lets me flip into sport mode or normal mode and just cruise around and explore in some areas instead of having to rip in manual mode all of the time. It also makes it nice for just learning how to fly a drone better. You can start off in normal, work your way up into sport, and then get the curve to try and fly in manual. If you get into trouble, flip right back into normal, get yourself reset, and try to go back into manual to learn how to become a better drone pilot.
DJI Avata 2 Overall Improvements
Okay, so that was a lot to cover. Overall, the Avata 2 has been improved over the Avata 1 in big ways. It looks better, it’s a lot more sleek, it’s built better, it performs better, it’s much quieter, it has a much better camera here on the front, it also has made the jump from O3 to O4. So really, this drone has been improved in every way possible. But this is only half the story, as look at everything else here on the desk. All of these things have also been improved to give you a better flight experience with the Avata 2.
DJI Goggles 3 Improvements
While the Avata 2 was a massive upgrade, I would say that the Goggles 3 is a close second, with the biggest improvement actually just being the way that it fits to your head. If you remember the old style goggles, let’s take the Goggles Integra for example, you’d put the main goggle portion over your eyes and then you’d spin the dial on the battery pack to tighten them up against your face. This would lead to soreness after long periods of flying along the bridge of your nose and just above your eyes on your forehead, at least that’s how it felt for me.

The Goggles 2 had a very similar design, but there was no built-in battery. It instead had a standalone pack that would provide power via a long wire from wherever you chose to mount it.
The DJI Goggles 3, despite looking similar, is a complete overhaul to how they fit to your head and face. The back battery strap is unchanged from the Goggles Integra, but now this strap connects to a single point of contact on your face just above your eyebrows on the forehead.
The mounting point then connects to the goggles through a bracket that has a small range of motion both forwards and backwards. This lets you get a nice, tight seal around your eyes without putting any pressure on your eyes, cheeks, or nose. These side light seals also wrap around your face for the ultimate light blockage. The inside of the goggles is pitch dark, with absolutely no light leak.
Now these brackets on the front here, as I mentioned, that connect the goggles to the actual piece that sits on your forehead, have a very small range of motion. So these aren’t meant to like flip up to let you look around and see. It actually probably moves only like 2, 3, maybe even 5° to just let you kind of tighten it up against your face and again seal out the light. It also clicks into place, but you’ll notice that once you get these goggles on, you can push it right up against your eyes, and from there, all of the light is completely cut out.
Vision Cameras on the DJI Goggles 3
Speaking of exposing your eyes, another big upgrade is these two vision cameras on the front, which lets you see through the goggles at your surrounding environment. A double tap on the side of the goggles will open up this view right on the screens inside.
Now before you get all excited, while this is a great feature to implement into a set of goggles like the Goggles 3 here, it’s something that I would never use, and there’s really one thing that kills it, and it’s the tight field of view.
Unfortunately, I can’t screen record inside of the goggles when I switch to that view through the goggles, so I’m going to have to try and record my screen by putting my camera up to the lenses. Hopefully you can get a good understanding, though, that the field of view is way tighter than your field of view from your eyes, which makes looking around and moving around very disorienting.

To me, this is like a good first step. I understand what DJI is trying to do. They want you to be able to sit inside of the goggles, totally cut off from the outside world and quickly tap to be able to see what’s in front of you or look up and see the drone in the sky. But instead, you’re just left with this super tight field of view, and again, it feels really disorienting.
So for me, it’s something I would never use. It is nowhere near the same level as what you get on say, the pass-through on Apple Vision Pro or on the Meta Quest. But again, it’s a step in the right direction, and I’d like to see DJI take this technology and work towards a full color pass-through, as I’ve mentioned in previous videos, to give you this fully immersive experience where you can put windows up in space or again cut out all the light around you and just fly first-person view.
To me, this is a good idea, it’s a good step in the right direction, but I think that the execution was poor. Like again, the tight field of view just makes it unusable for me. I’d much rather bring my drone to a pause, hit the brake button or just let it hover there by going in normal or sport mode, pulling my goggles up over my eyes, put them on my forehead, do whatever I need to do, put my goggles back over my eyes, and then get back to flying.
I recently made a video hoping for DJI to adopt the pass-through technology that Apple and other VR companies have implemented on their goggles, and while these other headsets have way more cameras than just the two forward-facing sensors, I’d hope that DJI builds on this and improves the technology for a more augmented reality-like experience in the future.
Other DJI Goggles 3 Features
So other than the fit and the new cameras here on the goggles, everything is pretty much the same from what we’ve seen in previous iterations of the DJI goggles. So they’ve kind of mixed what was in DJI Goggles 2 and DJI Goggles Integra and brought them together in one upgraded platform.
Head tracking is built in, as well as the adjustable diopters for use without glasses from the Goggles 2, and we have the built-in battery and GPS module from the Integra goggles for easier use. The screens are the same though, which in my opinion, really didn’t have to be changed. They’re crisp, bright, and have a nice high refresh rate for an immersive experience.
User Interface Changes
Now here is where we start to get into some big user interface changes with the Goggles 3 and the RC Motion 3. When you have the goggles on, you can actually use the motion controller as a pointer controller, just like you would with the Oculus Quest. This lets you zip around the menu and select different points with ease instead of having to jam on the directional buttons on top of your goggles.
You can even stop your drone mid-flight to use the motion controller to select options in the user interface instead of controlling the drone. To me, that is a pretty awesome way to make this one complete, seamless system.
DJI RC Motion Controller
This also starts to highlight some of the changes made with the third version of the motion controller here. The first of which being the size. This remote is pretty tiny now and fits in the hand really well. This size, however, doesn’t compromise the controls, as everything you’d expect is still here with some minor changes.

One that might throw experienced motion controller flyers off is the reorientation of the buttons and joystick, which now sits on the left instead of the right. The dial on the side is also facing more up and down so you can easily access it during your flight.
Despite these small changes, the core functionality is still there. With the motion of your wrist, you’re able to control the direction of your drone. You can of course pull the trigger towards you or away from you to go forwards or backwards, and you can use the joystick to move the drone as well.
You know, a lot of people really hate on the fact that the Avata comes shipped with the motion controller instead of the regular remote with sticks, but I’d have to say that this is probably the preferred method of flying amongst the everyday person flying this drone. Someone who’s just picking this up will probably find way more success using the natural motion from their wrist to fly the Avata 2 as opposed to the little sticks on the FPV remote.

FPV Remote Controller Changes
Speaking of this remote, it has also gone through a change, but it’s not as game-changing as the changes made to all the other devices here on the table. It’s actually the slightest difference. It’s the fact that the antenna is now integrated into the top of the controller, and also it’s the fact that this controller runs O4 instead of O3.
Some might be skeptical regarding the connection strength, as the last FPV remote had a flip-up antenna that extended further away from the remote, but as I showed you earlier in this video, I’m getting great results with the antennas that are on this remote and on the drone.
Avata 2 Accessories
Let’s wrap up this review by discussing some of the different accessories that come along with the Avata 2 Fly More Kit. Starting off with the bag, this thing reminds me of a retro bag that I would have for an old-school camcorder with all of the tapes and extra batteries. But the way it’s laid out is actually perfect for what you would need to carry with you.
The goggles fit perfectly on the side and then you have a small compartment for the batteries and charging hub, both the FPV remote and the motion controller, and of course the drone slides in there also. We even have some extra pockets for things like ND Filters, wires, replacement parts and other miscellaneous items. There’s even room up here to say lay extra batteries if you want to bring more with you.

I’m usually the type of person that likes to bring two drones with me on every shoot in case something happens to the first one. So in this case, I need to be able to carry two Avata 2s with me – if something went wrong with the first one, I could just go into my bag and pull the second one out for a high level of redundancy. And you just can’t fit two drones and a bunch of accessories here inside of this small bag.
So while I’ve been using this for the past month as I’ve reviewed the Avata 2, I think I’m probably going to end up moving into my DJI goggles backpack. Right now my Avata 1 is in here and I’ve got like 10 batteries, two remote controllers, two headsets, two drones – I’ve got so much inside of just this one bag.
So again, I’ll probably end up putting the Avata 1 on the shelf and move my Avata 2 into the bigger backpack just so I can carry a little bit more gear with me.
Battery Hub Complaints
Now let me quickly complain about this battery hub. Why does it have to be this big? Why does it need to be a massive sleeve that covers the entire battery? If we compare this to the original Avata’s charging hub, I would much rather have something with a low profile like this. Not to mention I could put four batteries on here instead of the three for my Avata 2.
This design is very similar to the battery hub that we got for one of DJI’s newest drones, the Air 3S. So these are the newest battery hubs from the newest drones and I certainly hope that we’re not going down this trend of having these huge battery hubs with only three available charging ports for our batteries.
I will give credit to the batteries themselves, though, as they are a much better improvement over the Avata 1 batteries as they’re skinny and slide right into place. There isn’t a wire that you need to use to make the connection to the drone.
Also, for those wondering, there will be ND filters available from DJI right off the bat that just clip right onto the front. But I’m sure there will be dozens of options you can choose from third parties like Freewell, SkyB and all of those other companies.
Wrapping Up
Well I think that’s about it for my review here of the Avata 2 and all the things that it comes with – all the things you need to fly it, the Goggles 3, the RC Motion 3, and the FPV Remote 3.
If I had to sum up this video into three things, three upgrades that are my favorite about the Avata 2:
- It’d be the camera – that’s a massive improvement.
- It would be the flight time – being able to get much more out of one battery is definitely a nice change.
- It’d be the fit of the goggles on your face with the Goggles 3.
Those three things right there for me are enough to make the jump to upgrade from the first Avata to the Avata 2. But don’t worry, we’ll be doing a full comparison between the Avata 1 and Avata 2 to break down every upgrade and every change to see if it’s actually worth it to have to buy not only a new drone, but new goggles and a new remote controller.
Anyway, thank you guys so much for watching. Let me know your thoughts on the Avata 2 down below and as always, I’ll talk to you later. Peace!


+ There are no comments
Add yours