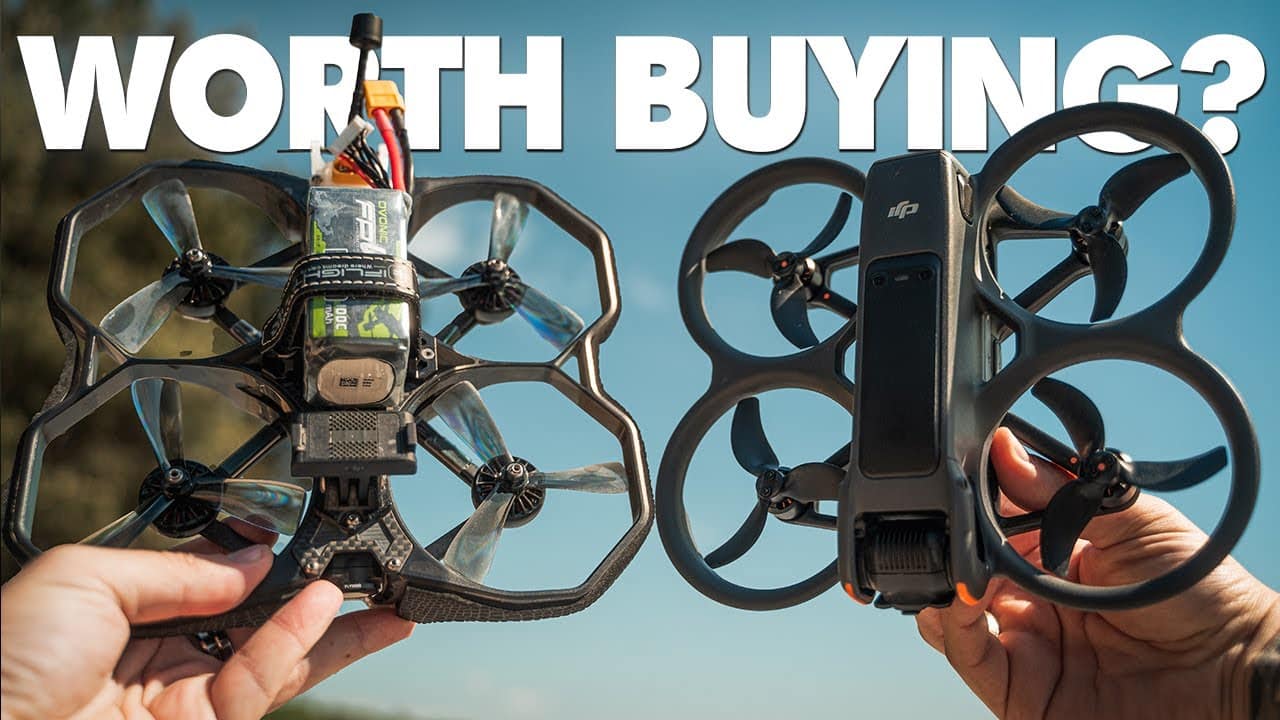
What’s up guys? Today we’ll be talking about the brand new DJI Avata 2 versus a more traditional O3 Cinewhoop FPV drone. I’ll try to help you decide which one is the better fit for you. Let’s get started! As usual, the whole video will be divided into different chapters, so make sure you check the ones that interest you the most. Let’s get started with the camera first.
Camera Comparison
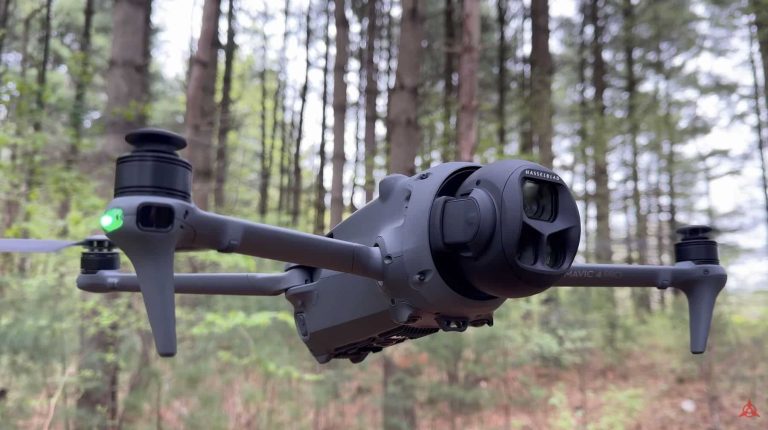
Obviously, the camera is a big talking point, as that’s the component that attracts arguably the most attention from customers. Whether it’s the O3 FPV system, which we have here on the iFlight Protek35, or the O4 Camera which comes on the Avata 2, there are a lot of differences between the two. If we even decide to throw an additional action camera into the mix, it gets even more complicated.

That’s one of the themes of this video – everything is modular when it comes to those ready-to-fly pre-built drones, or even the ones that you decide to build yourself. You can have full control over every single aspect of the components that you want to use, whereas on the Avata 2 you have a fully built drone with specific components that you just have to deal with.
Personally, I’m a huge fan of the new O4 camera that we have here. It really reminds me, or it’s exactly the same, as the performance that we are used to getting from the DJI Osmo Action 4, which is a great thing. In my opinion, the Osmo Action 4 beats the GoPro Hero 12 Black. I did a full comparison video between the two cameras which I will drop down in the description if you want to watch that as well. Personally, I’m a big fan of the image quality coming out of the Osmo Action 4, so having a built-in system that has that specific quality that I’m such a big fan of is a big advantage.
Here on the Protek35, for example, we can use the O3 camera just as a DVR / FPV camera. We don’t have to use it for recording. We can put the Osmo Action 4, GoPro Hero 12 Black, or any other camera that we want and we can divide them and extract the footage only from the top camera (the action camera). You don’t have that flexibility with the Avata 2, and let me tell you why that’s important.

For example, if you want to shoot in a lower frame rate such as 24, 25 or 30 frames per second, that is not ideal for your DVR – for what you’re seeing inside your goggles. Since we only have one camera on board here on the Avata 2, it is a little bit limiting. Whereas here, you can set your O3 FPV camera to shoot at 120 frames per second if you want to, and set your action camera on top to shoot at 24 frames per second, for example.
That not only helps you with visibility, with the settings, with the different types of areas that you can go through with the locked camera settings on top of the camera, but that’s also great for redundancy. Let’s say you crash and you damage your SD card, or your footage gets corrupted – you still have a backup to fall back to from the O3 camera, for example, or vice versa. You have some type of flexibility to use your backup from the second camera. With the DJI Avata 2, you don’t have that.
But for the most part, I think for everyday scenarios, for not so risky shots where you know you can kind of get away with that, I don’t think that’s such a big deal. I’m not sure that’s a deal breaker for many people. For me, it’s certainly not a deal breaker, but it’s important to mention as I know some people will have to mention that in the comments, so I need to mention that first.
Just to finish off the chapter when it comes to cameras – it’s a great thing to have a built-in camera that you know can give you the best quality possible without having to put an additional weight on the drone. This is something that I really enjoy, and I’ve been enjoying it with the O3 air unit as well, but this is just the next level. It gives you so much better quality, in my opinion, than what we used to have on the O3.
So now we have that better system that is all integrated, gives you great camera footage and quality, and doesn’t have to rely on something additional on top that will just lower the flying performance of the drone when you put it on.

Performance Comparison
When it comes to the performance of the drones, there’s quite a lot to say. First off, the Avata 2 flies absolutely beautifully straight out of the box with no adjustments whatsoever. The tune seems to be great, and I haven’t felt the need to adjust any of the rates, which is quite unusual for me. The cruising is smooth and feels great, although a bit slow at times. This is arguably my biggest disappointment with this drone.
Its max speed is limited to 19 m/s in Europe due to regulations, as opposed to close to 27 m/s in the rest of the world, which is quite a significant difference in terms of speed. Because of that, at times the drone feels kind of sluggish and doesn’t allow for every single acro move you have in your head, especially ones that require quick acceleration to its maximum speed and then a sudden stop, such as a large dive or a split-s.

Yes, you can most certainly do these moves with the Avata 2, but they have to be a bit more gradual and smooth, as opposed to what you can do with a traditional cinewhoop such as the Protek35, for example, which picks up speed a lot faster and has no issues doing aggressive acro moves.
However, due to the additional weight of the Action 4 on top of the Protek35, the drone itself was performing quite poorly in terms of flying characteristics. So I unmounted the camera and recorded footage just with the built-in O3 air unit camera, which still looks quite good in my opinion, minus the fact that the sensor is smaller and doesn’t get as much light inside as the O4. This results in a much darker image when using the same exact settings, such as ISO and shutter speed, and when using an ND32 filter. So I had to bring up the max ISO setting on the Protek35 to 800. This improved the overall look of the image, and I felt that the drone flew nicely as well.
All in all, I think if you live in Europe and you’re looking for a drone that can do it all, the DJI Avata 2 is damn near perfect, but comes with some major drawbacks, such as the limited max speed and the fact that it can’t do really aggressive acro moves, which are quite easy to achieve with a powerful cinewhoop like the Protek35. If you don’t live in Europe and you don’t have that ridiculous maximum speed limitation, then I’m sure the Avata 2 will be up there with some of the best cinewhoop drones that you can buy right now.
Finally, I felt that the signal strength and the signal degradation in general are much better with the Avata 2, which is of course quite understandable since it comes with a much improved signal range and overall signal performance due to the O4 transmission system.
Modularity Comparison
Another big talking point when it comes to these two systems is modularity. The Avata 2 has no modularity whatsoever besides the props that you can exchange for some other props. There really isn’t anything that you can do to this drone to make it fly better as of right now. There used to be some improvement kits with different motors for the Avata 1 that really transformed the way that drone flew. However, it’s not ideal to put these on as you can really damage the drone if you’re not sure what you’re doing.
Whereas here, with the Protek35, you just need to buy a different type of component if you want to exchange it. If you damage it, you can replace it straight away. It’s just a matter of soldering something small or tightening a screw, and that’s it. So the modularity aspect is very important, because it allows you to exchange different parts at a very low cost. You can exchange the components that are the ones that really matter, such as motors, ESCs, and flight controllers. You can get additional accessories, such as longer antennas, whereas on the Avata 2 you are kind of limited.
There are not that many spare parts, or there might not even be any spare parts besides props on DJI’s website. So you are kind of stuck – if you damage this drone, you have to send it over to DJI for repair, and that’s a big no-no for many people when it comes to flying FPV, because FPV damages your drones. It’s just something that happens all the time. So you kind of always need to repair your drone after a big crash or a flight that has been risky and dangerous.
Obviously, remote controllers are an additional modular aspect that has to be included in this chapter. With this drone, the Avata 2, we only have two options for how to control it: we have the DJI RC Motion Controller 3 and we have the DJI FPV Remote Controller 3. Whereas with any traditional O3 FPV drone, we have a plethora of different radio controllers that we can use.
Whether you prefer to have a small form factor radio or you prefer the big radios, whether you prefer traditional gimbals or you prefer the Ago 1s that I have here on my RadioMaster Zorro, you have so many different things, so many different accessories. Even the tips here, you can exchange them to make it more comfortable for your thumbs if you’re a thumb flyer. It’s all the customization that you can get, whereas with the Avata 2 there is almost zero customization. You’re stuck with what DJI gives you and you kind of have to deal with that.
So of course, when it comes to modularity, there is no point of arguing – definitely the traditional FPV system here wins, and traditional FPV Drones are far ahead when it comes to customization and modularity.
Built-in Safety Feature of the DJI Avata 2
However, one thing that I’m a huge fan of is the built-in safety features of the Avata 2. The fact that you don’t have to worry about losing signal with this drone is huge. With traditional FPV, you always kind of have to know your limits, because when you cross those limits, you are going to failsafe and the drone will just fall out of the sky. Even if you have selected and configured your GPS rescue, unless you are 100% certain in what you’re doing and you have tried it many, many times, you don’t even have that certainty every single time. But even then, you cannot rely on it every single time.

Whereas on the Avata 2, you have those safety features that are going to give you a lot of peace of mind. One of them is of course, the fact that you can let the drone hover in the air. You can switch back to normal mode and let go of the controller for doing something, and you don’t have to worry about landing the drone and taking off later. You can just set it to hover in the air and do your thing for a couple of minutes.
Return-to-Home Feature
And of course, the biggest thing – if you lose signal, if you cross the line, the drone will automatically go back to its home point because that return-to-home is very reliable when it comes to DJI drones. They have perfected it over the years, they know what they’re doing, and it’s far superior to what Betaflight is able to give you when it comes to GPS rescue on a traditional FPV drone.
For me, this is massive – to give me some peace of mind knowing that I can push the limits of the drone, I can really go far and kind of play with the limit of what’s possible with the O4 transmission system, which is kind of impressive as it is. But you never know how much you can push it unless you kind of go a step over it and see where the signal really drops. In that regard, I’m a lot more comfortable with flying the Avata 2. I know it will come back to me, I’m not going to lose the drone if I happen to lose signal – it will come back to me without any issues.
Compatibility
Next, we need to talk about compatibility, because this is major. As of right now, the only compatible accessories with the Avata 2 are the DJI Goggles 3, the DJI RC Motion Controller 3, and the DJI FPV Remote Controller 3. Those are the only things you can use to fly the DJI Avata 2.
Whereas, of course, with the O3 system, we have pretty much all the different remotes that you can use, all the different systems. Whether you want to use a receiver such as Crossfire, you want to use ELRS, if you want to use the Goggles Integra, the Goggles 2, even the regular V2 goggles – you can use them. You have a lot of flexibility when it comes to this system.

So it’s really up to you whether you want to keep using your accessories that you currently have, if you want to purchase some additional accessories, or you want to wait until DJI makes them available to fly the Avata 2, which is a rumor that it’s coming in about a month or so. Hopefully it will really happen, it’s not just a rumor. I really hope so, because the Goggles 3 are fantastic. I really like the comfort of these goggles and the fact that they just stick to your face that well with the forehead pad, which is a game changer as opposed to not having anything here on top on all of the different goggles.
Whichever foam or whichever strap I’ve used, they’ve never been that comfortable on my face. There’s always a little bit of light leak around under my eyes or around my eyes. So I’ve never been super happy, especially with some sorts of blurriness around the edges of the goggles. You can never see perfectly fine with these goggles, at least that’s for me. Maybe I have a different type of face that is not made to be used with the Goggles 2.
But even though they are semi-comfortable, they’re not 100% comfortable for me, whereas with the Goggles 3, I don’t have those issues. So the comfort is really there and I don’t have any light leaks. I feel perfectly fine flying with these goggles and really want to use them with all of my other drones.
So I really hope the compatibility is expanded in the very near future, but for now, the traditional FPV drone wins.
Battery Life
Now let’s talk about battery life, because this will be short and sweet. When it comes to the Avata 2, a maximum flight time of up to 23 minutes with a single battery. When it comes to traditional FPV drones, a maximum of six, maybe seven minutes of flight time if you don’t put an additional action camera on top and if you’re only cruising.
This is a huge win for the Avata 2. There’s no point of even talking about it because it’s such a drastic difference. Of course, if you put the Avata 2 into manual mode and you go ham on the throttle, you will extract maybe four, five, six minutes out of it, which is relatively similar to what you will be extracting out of the Protek35, for example. Even though I think it will be less than the Protek35 – it will probably be two, three minutes. But it really depends on what type of battery you’re using.
I’m currently using batteries between 1300 and 1500 mAh 6S batteries on the Protek35, whereas here we have these traditional 2200 mAh batteries on the Avata 2. So for regular type of flying which does not require 100% throttle, the Avata 2 definitely gets the win.
Barrier of Entry into FPV
Coming up next, we have the barrier of entering the FPV hobby, which we all know is a very high barrier, because FPV is complicated. It’s not as easy as just charging your batteries and going out there to fly. You have so many different factors, you have so much information to learn when it comes to soldering, when it comes to building or repairing, when it comes to even charging your drone and the batteries and how to store them. There are so many things you need to learn and so much that can go wrong.
Whereas here, with the Avata 2, we have such a lower barrier of entering the FPV hobby that almost anyone can get this and get into this and start flying. Of course, not exactly in the same way as traditional FPV – not exactly in manual mode. DJI is making it easier for anyone, and I mean absolutely anyone, to start FPV by using the DJI RC Motion Controller 3. It’s so easy to get the hang of it and start flying straight away without the fear of losing or crashing the drone.

It’s just so simple – as soon as you let go of the throttle, it stops and hovers and waits for your next command. It’s super easy and it’s not complicated at all to explain it to a complete beginner. Then, after you feel more confident with a remote like this, you can then jump to the DJI FPV Remote Controller, with which you can start in normal mode. Then, as you go on, you can switch to sport mode, and then finally, when you have completed a couple of hours on the sticks and you feel confident, you can then flip it into manual mode and start flying in acro, which is what you are, for the most part, always flying in on those drones – the traditional FPV drones.
So there is such a big, drastic difference in the experience of learning things without that much crashing. DJI is definitely taking the win here when it comes to ease of entering the hobby and making it available for everyone to join and start having fun with FPV. So for me, if I have to give advice to someone who is just starting out with FPV and they want to learn how to get better, how to actually learn how to fly, I would definitely push them towards the Avata 2 route because it’s that much more forgiving. It’s not as challenging as it is with traditional FPV and it’s really, really enjoyable. You don’t get that many frustrations that you usually get when flying systems that require a lot of knowledge, a lot of information, and a lot of skills to be able to repair them, to keep them in shape, and to keep buying parts for them as they continue to break.
Traditional FPV vs. the Avata 2
But there are some things that, of course, still push me towards the traditional FPV route, because as a person who’s been flying FPV for 5 years now, there’s just something that really intrigues me about these parts, these components, always squeezing out a little bit more out of each and every drone that we have. Whereas with the Avata 2, we are kind of left with a “take it as it is” type of solution that is not for everyone.
However, for the large masses, for the large groups of people who just want to experience FPV, this is the way to go. The Avata 2 is the better choice. But for the ones that prefer to tinker, prefer to upgrade, to really squeeze out the most out of their drone and maybe be able to do more with the drone, then of course traditional FPV is the way to go.
The Future of FPV
I am super excited to see if DJI will release an O4 air unit, which will give us what we used to have with the previous generation of drones with this camera. If it can be transformed and put on a drone like this, then it will be game over. It will be amazing – you will not have to use any action cameras on top of drones anymore, at least for many people. We will not have to use them. So that’s great, and I’m looking forward to what the future holds when it comes to FPV. It’s going to be amazing, it’s going to be a lot of fun.
And that’s pretty much it for today’s video. I really want to thank you for sticking out with me until the end of the video. This is Mike from Drone Supremacy. Thank you for your support. Subscribe to the channel if you want to see more videos like this one, and I’ll catch you in the next one very, very soon. Ciao!

+ There are no comments
Add yours